If you have been dreaming about enjoying a rich, creamy dessert that fits perfectly into your low-carb lifestyle, this Keto Chocolate Cheesecake Recipe is exactly what you need. It combines the deep, luscious flavor of unsweetened dark chocolate with a velvety, smooth texture that will satisfy your sweet tooth without any guilt. Each bite melts in your mouth, offering the decadent experience of a traditional cheesecake but completely keto-friendly. Whether you’re impressing guests or treating yourself, this cheesecake promises a delightful dessert that is as easy to make as it is delicious.
Ingredients You’ll Need
Gathering the right ingredients for this Keto Chocolate Cheesecake Recipe is surprisingly simple, yet each one plays a crucial role in bringing out the perfect balance of taste, texture, and color. From the nutty almond flour base to the creamy richness of cream cheese and the deep chocolate notes, these staples blend together to create a truly irresistible dessert.
- Almond flour: Acts as a gluten-free, low-carb base with a mild, nutty flavor that forms the crust.
- Unsweetened cocoa powder: Adds intense chocolate flavor without extra carbs or sugar.
- Powdered erythritol or monk fruit sweetener: Natural keto-friendly sweeteners that keep the cheesecake perfectly sweet without raising blood sugar levels.
- Melted butter: Binds the crust ingredients together and adds a rich, buttery depth.
- Vanilla extract: Enhances all the flavors and adds a lovely aroma.
- Cream cheese: The star ingredient that ensures the cheesecake is decadently creamy and smooth.
- Heavy whipping cream: Gives the filling a lightness and extra richness.
- Unsweetened dark chocolate: Provides a velvety texture and bittersweet chocolate intensity.
- Large eggs: Essential for setting the cheesecake and creating its classic dense texture.
How to Make Keto Chocolate Cheesecake Recipe
Step 1: Preheat and Prepare the Pan
Preheat your oven to 325°F (163°C) and generously grease an 8-inch springform pan with butter or coconut oil. This step is super important because it helps the crust release easily later and ensures your cheesecake bakes evenly.
Step 2: Mix the Crust Ingredients
In a mixing bowl, combine the almond flour, cocoa powder, powdered erythritol or monk fruit sweetener, melted butter, and vanilla extract. Mix everything well until the texture resembles wet sand. This mixture is your chocolatey, nutty crust that forms a firm base for your cheesecake.
Step 3: Press the Crust into the Pan
Take the crust mixture and press it evenly across the bottom of your prepared springform pan. Make sure to press firmly but not too hard—this helps the crust hold together after baking and gives you that perfect crunch beneath the creamy filling.
Step 4: Bake and Cool the Crust
Bake the crust in your preheated oven for 10 minutes. Once done, take it out and let it cool while you prepare the luscious cheesecake filling. This brief baking sets the crust just enough for the filling to rest on.
Step 5: Beat the Cream Cheese and Sweetener
In a large bowl, beat the softened cream cheese together with the powdered sweetener until the mixture becomes smooth, fluffy, and free of lumps. This step is key to that ultra-creamy texture you want in a cheesecake.
Step 6: Add Chocolate and Flavorings
Mix in the melted unsweetened dark chocolate, cocoa powder, and vanilla extract with your cream cheese mixture. Stir gently until the chocolate is fully incorporated, turning the filling a beautiful, deep chocolate brown with an intense flavor.
Step 7: Incorporate the Eggs
Add the eggs one at a time, beating each just until it’s combined. Be careful not to overmix here—the eggs help the cheesecake set but too much air can lead to cracks or bubbles after baking.
Step 8: Pour the Batter Over the Crust
Pour your rich, chocolatey batter over the cooled crust and smooth the surface with a spatula. This even topping will bake into a beautifully dense but creamy cheesecake that holds its shape perfectly.
Step 9: Bake Until Just Set
Bake your cheesecake for 45 to 50 minutes. You’re looking for set edges with a slightly jiggly center, which means it’s perfectly baked and will firm up as it chills.
Step 10: Cool Gradually
Turn off the oven and open the door slightly, letting the cheesecake cool inside for 30 minutes. This gradual cooling reduces the chance of cracks and keeps the texture silky smooth.
Step 11: Chill Thoroughly
Transfer the cheesecake to the refrigerator and chill for at least 4 hours, or better yet, overnight. Chilling is crucial—it helps the flavors meld and the texture to fully develop that classic cheesecake density.
Step 12: Slice and Garnish
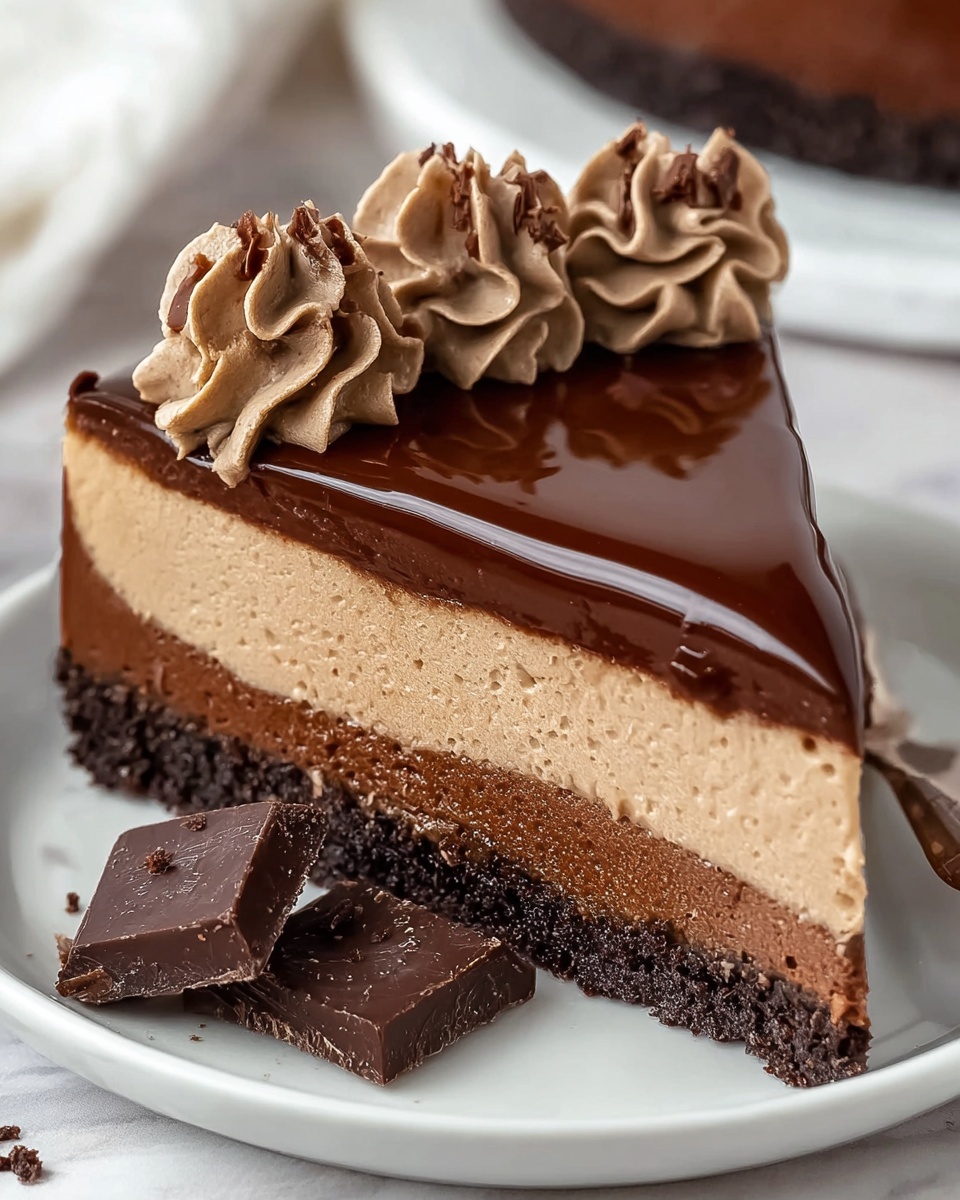
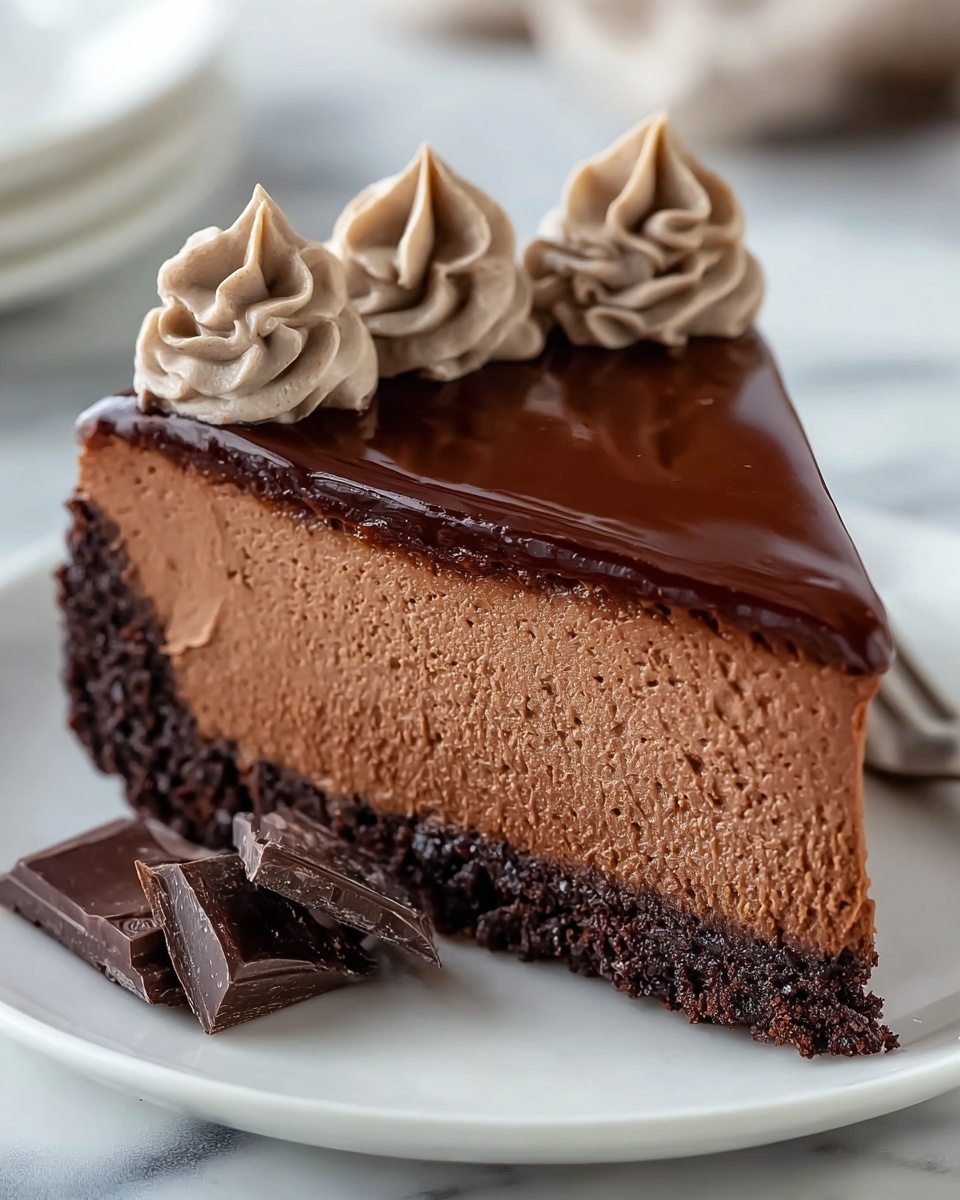
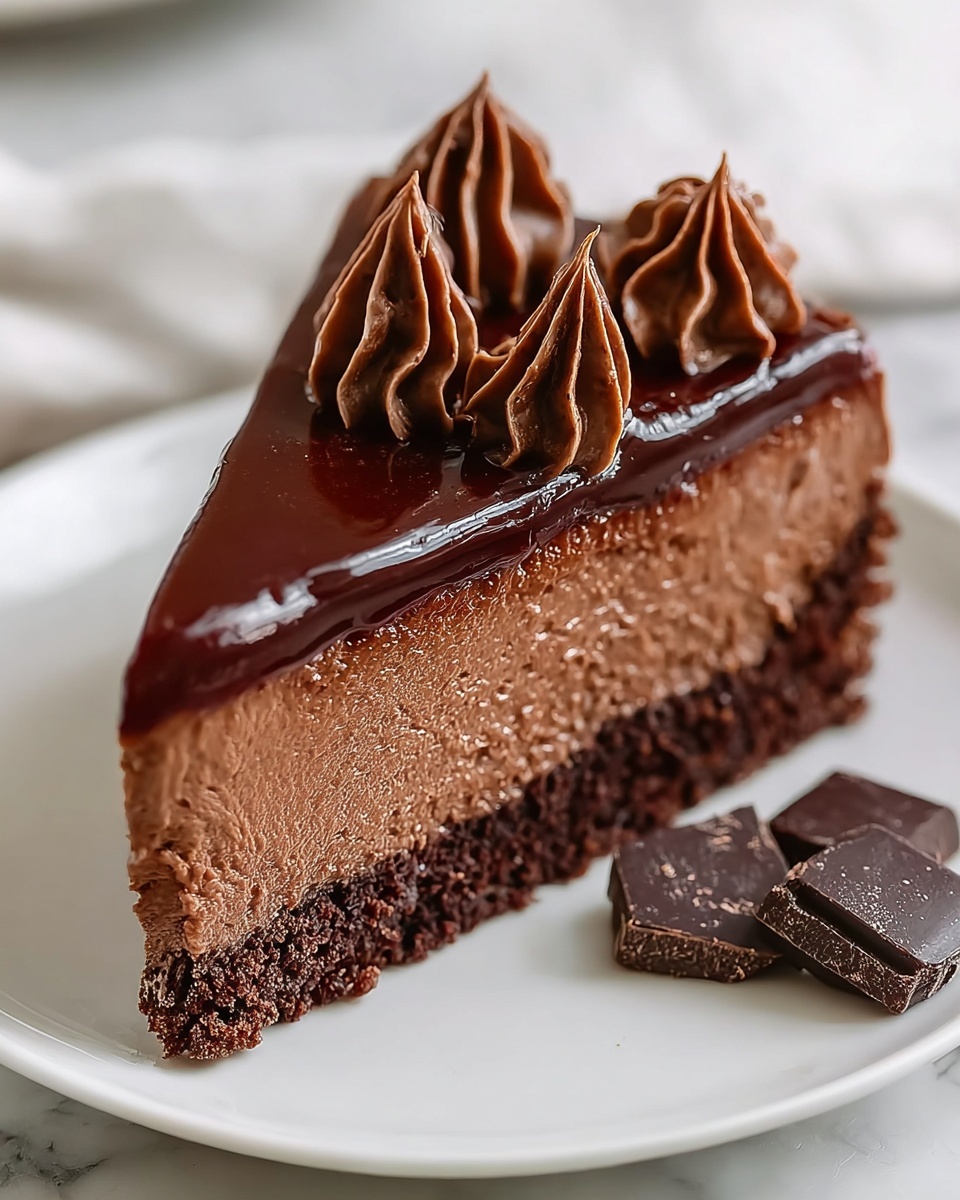
When ready to serve, slice your cheesecake into ten generous pieces. Add your favorite keto-friendly toppings like sugar-free whipped cream, fresh berries, or even chocolate shavings for an extra touch of indulgence and color.
How to Serve Keto Chocolate Cheesecake Recipe
Garnishes
Garnishing your Keto Chocolate Cheesecake Recipe can take it from delicious to show-stopping. Think dollops of rich, sugar-free whipped cream, a handful of fresh raspberries or strawberries for brightness, or a sprinkle of finely grated dark chocolate to echo the intense cocoa flavor inside. Each garnish adds a layer of texture and flavor that makes every bite even more enjoyable.
Side Dishes
This cheesecake pairs beautifully with light, fresh sides such as a minty green salad or a citrusy fruit compote that can offset the richness. For a heartier option, nuts like toasted pecans or walnuts on the side add a satisfying crunch and complement the creamy texture. They also keep the dessert experience perfectly keto-friendly.
Creative Ways to Present
Presenting your Keto Chocolate Cheesecake Recipe can be as fun as making it. Serve slices on elegant dessert plates with delicate drizzles of melted sugar-free chocolate sauce or a dusting of cocoa powder. You could also turn it into adorable mini cheesecakes by baking in muffin tins with parchment liners. Layering the cheesecake with keto-friendly mousse or berries in a glass for parfaits is another eye-catching and delicious approach.
Make Ahead and Storage
Storing Leftovers
Store any leftover cheesecake in an airtight container in the refrigerator for up to five days. Keeping it well covered prevents it from absorbing other flavors and keeps the texture moist and creamy until your next craving hits.
Freezing
This cheesecake freezes beautifully. Wrap individual slices tightly in plastic wrap and place them in a freezer-safe container or bag. They will keep for up to three months, making it a great dessert to prepare ahead for special occasions or busy weeks.
Reheating
When you’re ready to enjoy frozen slices, thaw them overnight in the refrigerator for best texture. If desired, bring them to room temperature for about 20 minutes before serving to regain that creamy feel. Heating is generally not recommended, as the texture of cheesecake changes when warmed.
FAQs
Can I substitute almond flour with another flour?
Almond flour is your best choice for this Keto Chocolate Cheesecake Recipe because it’s low in carbs and high in healthy fats. Using other flours like coconut flour or regular wheat flour will change the texture and carb count, so it’s not recommended if you want to keep it truly keto.
Is it okay to use a different sweetener?
Yes, you can try other keto-friendly sweeteners such as stevia or allulose, though they might slightly affect sweetness or texture. Powdered forms work best to avoid graininess, especially in the crust and filling.
How can I prevent cracks on my cheesecake?
To prevent cracks, don’t overmix your batter once the eggs are added, bake at the right temperature, and cool the cheesecake gradually in the oven with the door ajar before refrigerating. These steps help the cheesecake set evenly and maintain its smooth surface.
Can I make this cheesecake dairy-free?
While this recipe heavily relies on cream cheese and heavy cream for its traditional texture and taste, you could experiment with dairy-free cream cheese alternatives and coconut cream. However, this may alter the flavor and texture, so some trial and error might be needed.
What is the best way to slice the cheesecake?
For clean slices, chill the cheesecake thoroughly before cutting and wipe your knife with hot water between each cut. This prevents sticking and helps make perfect, neat slices that hold together beautifully.
Final Thoughts
You really can’t go wrong with this Keto Chocolate Cheesecake Recipe if you want a dessert that feels indulgent but fits easily into your keto lifestyle. The combination of creamy, chocolate goodness and the satisfying almond crust makes this cheesecake a standout in any dessert lineup. I hope you enjoy making it as much as I do sharing it—go ahead and give it a try. Your taste buds will thank you!
Print
Keto Chocolate Cheesecake Recipe
- Prep Time: 15 minutes
- Cook Time: 50 minutes
- Total Time: 5 hours 5 minutes (including chilling)
- Yield: 10 slices
- Category: Dessert
- Method: Baking
- Cuisine: American
- Diet: Low Carb, Keto
Description
This Keto Chocolate Cheesecake is a rich, creamy dessert perfectly suited for low-carb lifestyles. Featuring an almond flour chocolate crust and a smooth, chocolate-infused cream cheese filling, it’s a decadent treat without the sugar overload. Ideal for keto dieters or anyone craving a luscious chocolate cheesecake with minimal carbs.
Ingredients
Crust
- 1 ½ cups almond flour
- ¼ cup unsweetened cocoa powder
- ¼ cup powdered erythritol or monk fruit sweetener
- 5 tablespoons melted butter
- 1 teaspoon vanilla extract
Filling
- 16 oz cream cheese, softened
- ½ cup powdered erythritol or monk fruit sweetener
- ½ cup heavy whipping cream
- 4 oz unsweetened dark chocolate, melted
- 2 tablespoons unsweetened cocoa powder
- 1 teaspoon vanilla extract
- 2 large eggs
Instructions
- Preheat the Oven: Set your oven to 325°F (163°C). Grease an 8-inch springform pan thoroughly with butter or coconut oil to prevent sticking.
- Mix the Crust Ingredients: In a mixing bowl, combine almond flour, cocoa powder, powdered erythritol or monk fruit sweetener, melted butter, and vanilla extract. Stir until the mixture is well incorporated and crumbly.
- Press into the Pan: Evenly press the crust mixture into the bottom of the greased springform pan, ensuring it is firmly compacted for a stable base.
- Bake & Cool: Bake the crust for 10 minutes until set. Remove from oven and allow it to cool while you prepare the filling to avoid sogginess.
- Beat the Cream Cheese: In a large bowl, use a mixer to beat the softened cream cheese together with powdered erythritol or monk fruit sweetener until the mixture is smooth and fluffy, eliminating lumps.
- Incorporate the Chocolate: Add the melted unsweetened dark chocolate, unsweetened cocoa powder, and vanilla extract to the cream cheese mixture. Mix thoroughly until the batter is uniform and chocolatey.
- Add the Eggs: Beat in the eggs one at a time, mixing gently after each addition. Avoid overmixing to maintain a silky texture.
- Pour & Smooth: Pour the cheesecake batter over the pre-baked crust in the springform pan. Smooth the top with a spatula to create an even layer.
- Bake: Place the pan in the oven and bake for 45 to 50 minutes. The edges should be set, but the center will still jiggle slightly when moved—this ensures creamy consistency.
- Cool Gradually: Turn off the oven and crack open the door slightly. Leave the cheesecake inside for 30 minutes to cool gradually to prevent cracking.
- Chill: Transfer the cheesecake to the refrigerator and chill for at least 4 hours or overnight to allow it to set completely for clean slicing.
- Slice & Garnish: Once chilled, slice into 10 servings. Optionally garnish with sugar-free whipped cream, fresh berries, or chocolate shavings for extra indulgence before serving.
Notes
- Ensure cream cheese is softened to room temperature for a smooth batter.
- Do not overmix eggs into the filling to prevent cracks or a dense texture.
- Gradual cooling in the oven helps prevent cheesecake cracks.
- Use a springform pan for easy removal and neat presentation.
- Sweeteners like erythritol or monk fruit keep this recipe keto-friendly.
- Store leftovers covered in the fridge for up to 5 days.


