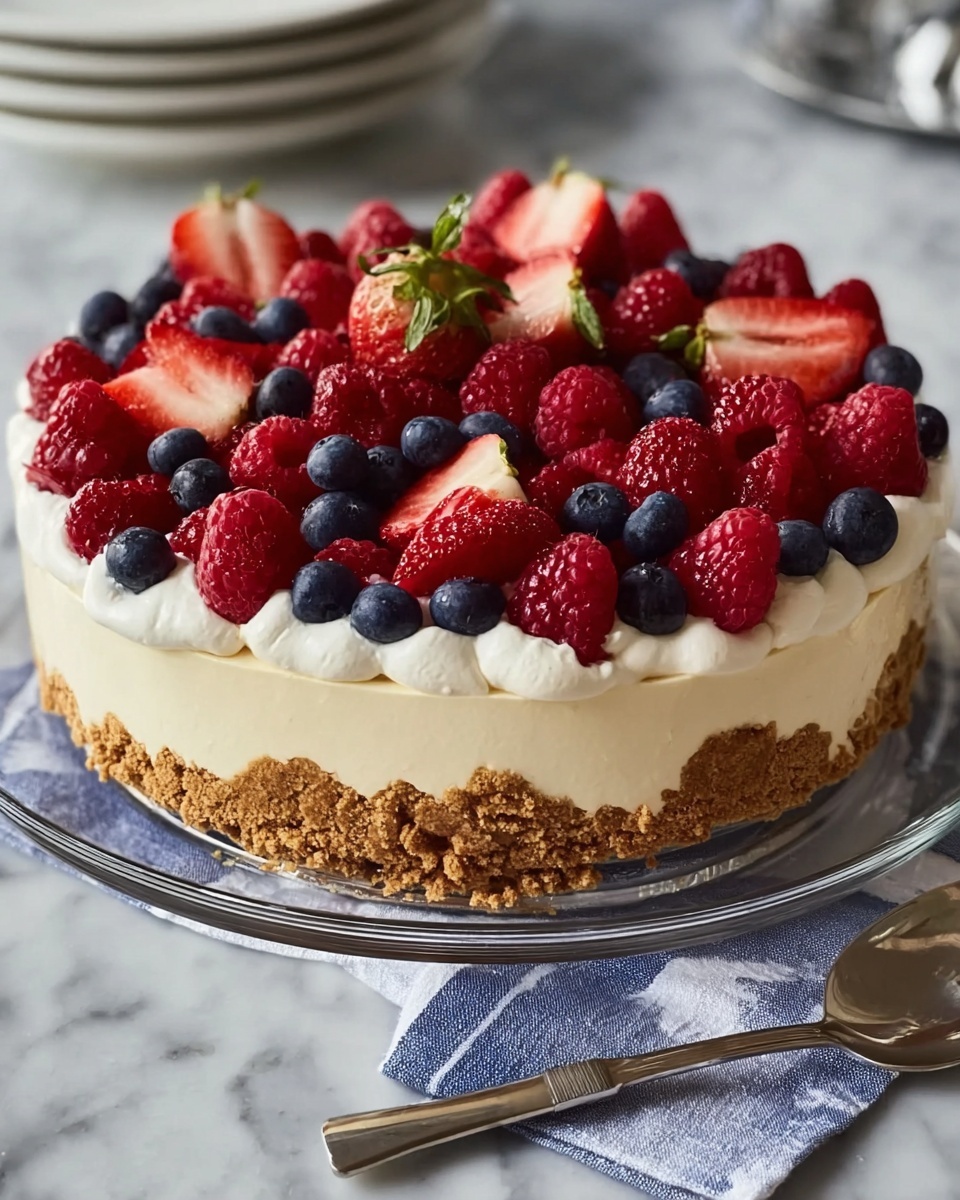
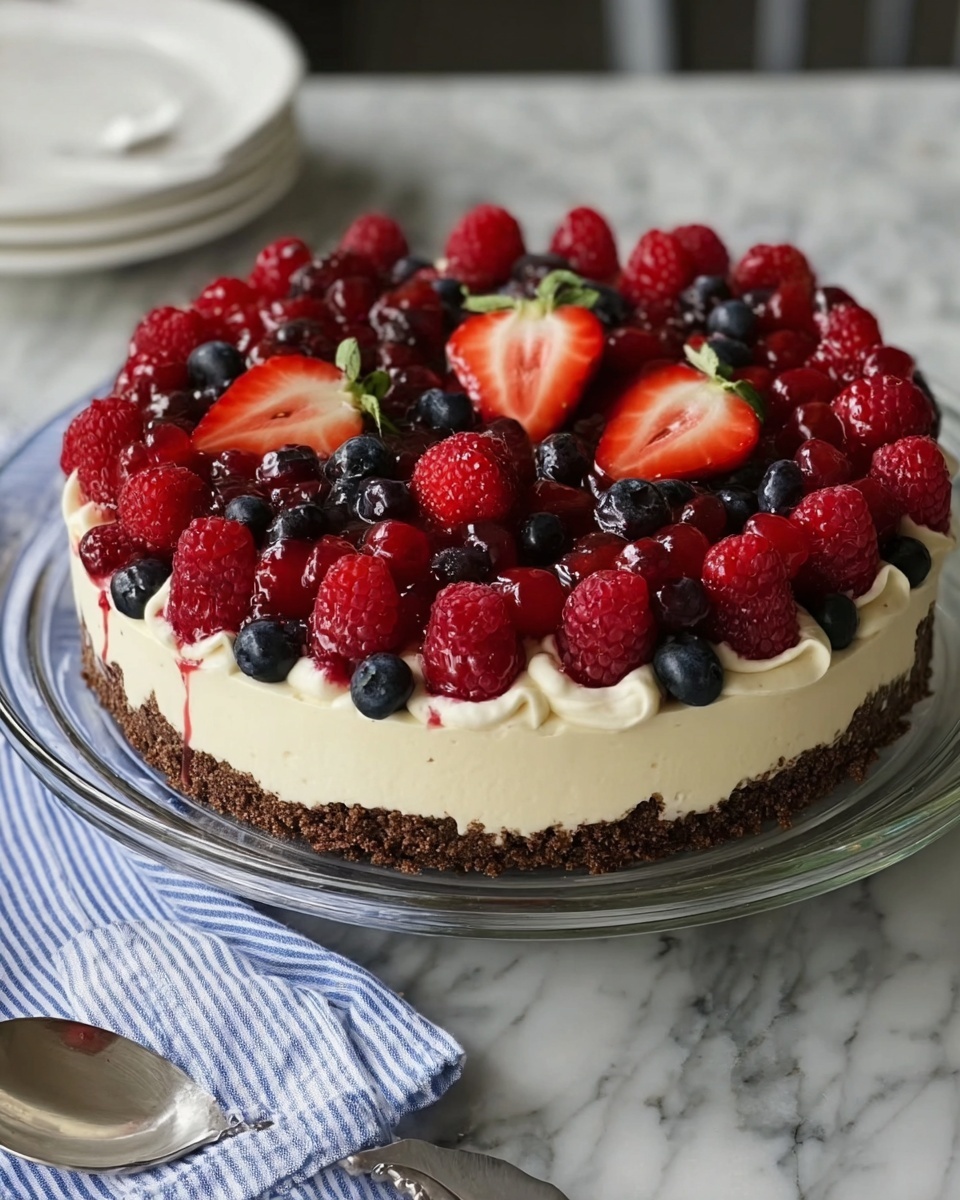
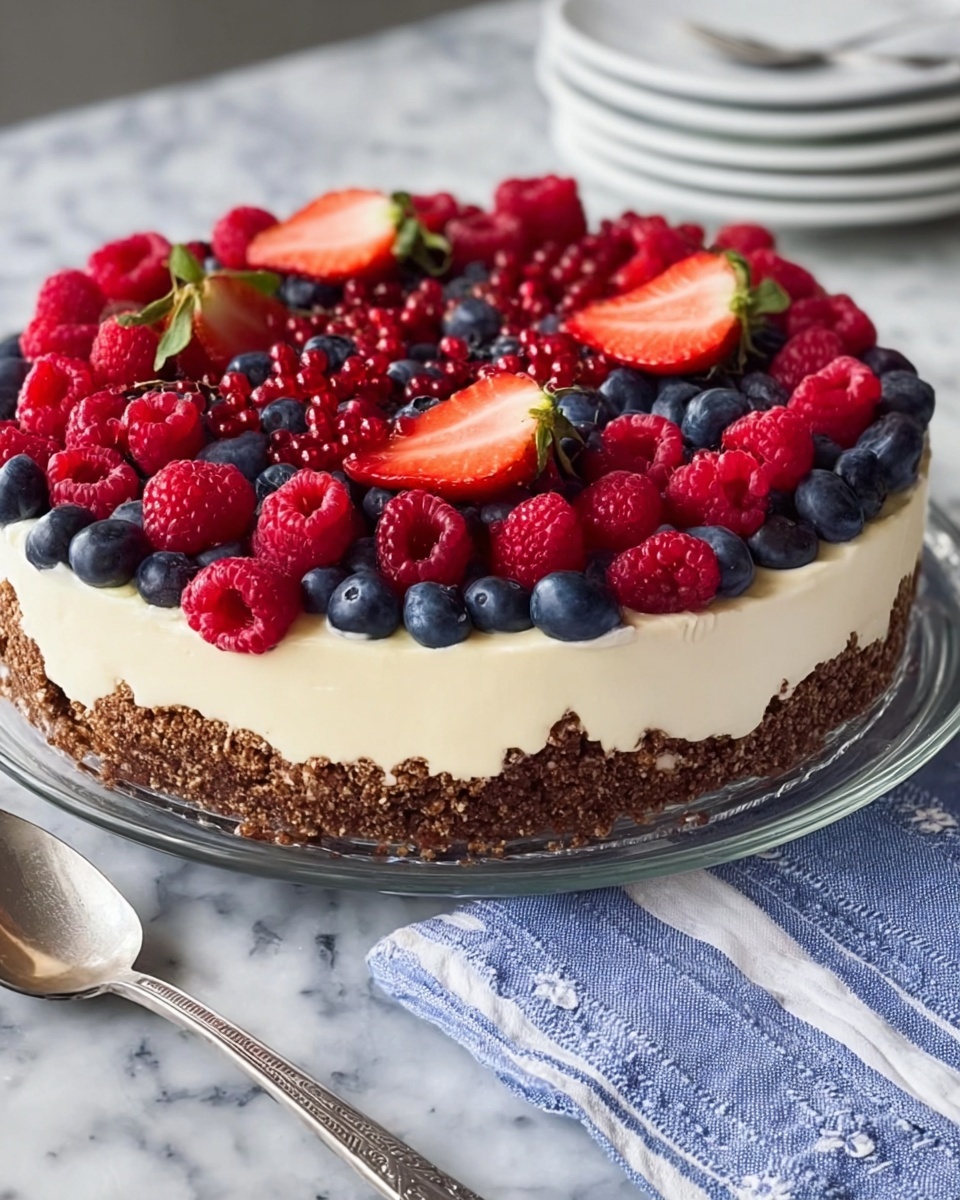
There is nothing quite as festive and delicious as a No-Bake Cheesecake Flag Cake Recipe to brighten up your celebrations or simply wow your guests with its patriotic charm. This dessert combines the creamy tang of a luscious cheesecake filling with the rich, buttery crunch of a chocolate-tinged graham cracker crust, all beautifully topped with fresh strawberries and blueberries arranged like a flag. It’s a no-fuss yet stunning dessert that dazzles visually and pleases every palate, perfect for summer outings, Fourth of July parties, or any joyful gathering where you want to impress without turning on the oven.
Ingredients You’ll Need
Getting the right ingredients here is essential because each one plays its part to create this delightful balance of flavors and textures. From the buttery crust that holds everything together to the rich, smooth filling, and finally, the fresh fruit that brings vibrant color and brightness, these ingredients are simple but pack a flavorful punch.
- 1 ½ cups finely crushed graham cracker crumbs: These provide a crunchy, slightly sweet base that perfectly supports the cheesecake layer.
- ¼ cup white sugar: Sweetens the crust just enough without overpowering flavors.
- 2 tablespoons unsweetened cocoa powder: Adds a subtle chocolate depth to the crust.
- 6 tablespoons butter, melted: Binds the crust ingredients together with richness and moisture.
- 1 cup cream cheese at room temperature: The classic tangy cheesecake component that creates a creamy texture.
- 1 cup mascarpone cheese at room temperature: Adds extra creaminess and a smooth, buttery flavor.
- 2 teaspoons grated lemon zest: Brings a fresh citrus spark to lighten the richness.
- 2 teaspoons lemon juice: Enhances brightness and balances sweetness.
- 1 teaspoon vanilla extract: A tiny touch of warmth and sweetness that rounds out the flavor.
- ⅓ cup white sugar: Sweetens the cheesecake filling to perfection.
- 1 ¼ cups cold heavy whipping cream: Whipped until fluffy to give the filling a light, airy texture.
- 20 large fresh strawberries, hulled and halved lengthwise: Bring juicy sweetness and form the bright red stripes of the flag.
- 24 large fresh blueberries: Add burst of tartness and create the blue star field on the cake.
How to Make No-Bake Cheesecake Flag Cake Recipe
Step 1: Prepare the Chocolate Graham Cracker Crust
Start by combining your crushed graham cracker crumbs, sugar, cocoa powder, and melted butter in a mixing bowl. Stir everything thoroughly until the mixture resembles coarse sand and holds together slightly when pressed. This rich, chocolatey crust will form the sturdy foundation your cheesecake needs while adding that delectable crunch everyone loves.
Step 2: Form and Chill the Crust
Press the crumb mixture firmly into the bottom of a 9×11-inch baking dish, smoothing it evenly with the back of a spoon or your fingers. Cover this base with plastic wrap and pop it into the refrigerator to chill for about 30 minutes. This sets the crust nicely so it won’t crumble when you add the luscious filling.
Step 3: Make the Cheesecake Filling
In a mixing bowl, blend together your cream cheese and mascarpone cheese until perfectly smooth and combined. Next, stir in the grated lemon zest, lemon juice, and vanilla extract to give the filling a fresh, aromatic lift. These citrus notes brighten the creamy decadence, keeping each bite exciting and balanced.
Step 4: Whip the Cream and Combine
In a separate chilled bowl, whisk the cold heavy whipping cream with ⅓ cup sugar until it forms soft peaks—light and fluffy. Gently fold this whipped cream into your cream cheese mixture with a gentle whisk, ensuring the filling remains airy yet thoroughly combined. This step is what gives the cheesecake its incredible lightness without baking.
Step 5: Assemble and Chill the Cheesecake Filling
Spread the smooth cheesecake filling evenly over your chilled crust, smoothing the top with a spatula. Tap the dish gently on the countertop a few times to release any air bubbles and help the layers settle nicely. Wrap with plastic wrap and place in the refrigerator to chill and set for at least 3 hours. Patience here means a firm, sliceable cheesecake every time.
Step 6: Create the Strawberry Stripes
Once your cheesecake is set, start crafting the flag’s red stripes. Along the bottom edge of the cake, lay strawberry halves side by side with their pointed ends facing right. Then form a second line of strawberries arranged at a slight angle at the top right corner extending about two-thirds across. Continue layering parallel fresh strawberry stripes across the surface, leaving a square space on the upper-left side for the blueberries.
Step 7: Add the Blueberry Field
Fill the reserved square in the upper-left corner with rows of blueberries carefully placed with their blossom ends facing up. Press the berries gently together so they form a tight, jewel-like patch of vibrant blue representing the stars of the flag. This contrast of color and freshness instantly elevates the dessert’s festive appeal.
Step 8: Serve and Enjoy
Slice the cake into neat squares to serve your festive, patriotic No-Bake Cheesecake Flag Cake Recipe. Each piece boasts a creamy filling, crunchy chocolate crust, and a colorful layer of fresh berries that make every bite absolutely joyful.
How to Serve No-Bake Cheesecake Flag Cake Recipe
Garnishes
To amp up the visual appeal and flavor, consider adding a few mint leaves around the serving platter. Their fresh herbaceous aroma complements the sweet-tart berries beautifully. A light dusting of powdered sugar right before serving can also add a delicate snow-kissed sparkle, perfect for celebrations.
Side Dishes
This cheesecake pairs wonderfully with a cup of freshly brewed coffee or a crisp glass of chilled sparkling wine. For a little extra fun, serve alongside some homemade whipped cream or a berry coulis to drizzle for those who prefer an extra fruity touch.
Creative Ways to Present
If you want to make your No-Bake Cheesecake Flag Cake Recipe even more special, try cutting it into individual star shapes with cookie cutters for party platters. You could also layer this cheesecake filling into small jars topped with berry patterns for portable festive treats, perfect for picnics or potlucks.
Make Ahead and Storage
Storing Leftovers
Leftover No-Bake Cheesecake Flag Cake Recipe keeps beautifully in the refrigerator for up to 3 days. Make sure to cover it tightly with plastic wrap or store it in an airtight container to maintain freshness and prevent the cake from absorbing any fridge odors.
Freezing
This cheesecake also freezes well if you want to prepare it in advance. Wrap the entire cake securely with plastic wrap and then foil, or slice into individual portions and freeze them separately. When ready to enjoy, thaw overnight in the fridge for a smooth and creamy consistency.
Reheating
Since this is a no-bake cheesecake, reheating is not necessary and can alter the texture. It’s best enjoyed chilled straight from the fridge or slightly softened at room temperature for about 10 minutes before serving to bring out full flavor.
FAQs
Can I substitute mascarpone with all cream cheese?
Yes, you can use all cream cheese if mascarpone is not available, but mascarpone adds a silkier texture and subtle richness that elevates the cheesecake’s flavor. Using only cream cheese might make the filling a bit denser.
Do I have to use cocoa powder in the crust?
The cocoa powder in the crust is optional but highly recommended because it adds a nice chocolate note that balances the sweetness of the berries and cheesecake. You can omit it if you want a classic graham cracker crust flavor.
How do I keep the fruit from leaking juice onto the cheesecake?
Make sure your fruit is fresh and well-drained before arranging. Patting the berries dry with paper towels helps minimize excess juice that could seep into the cheesecake. Serve relatively soon after decorating for the best look and texture.
What if I don’t have a 9×11-inch pan?
You can use a similar-sized rectangular or square dish. Just bear in mind the thickness might vary, so adjust chilling times slightly to ensure the cheesecake sets properly.
Is this recipe gluten-free?
Traditional graham crackers contain gluten, so this recipe is not gluten-free unless you use gluten-free graham cracker crumbs or an alternative crust made from gluten-free cookies or nuts.
Final Thoughts
There is a joyful magic in bringing the No-Bake Cheesecake Flag Cake Recipe to your table — it’s simple to prepare, delightful to look at, and absolutely delicious to eat. If you want a show-stopping dessert that captures the spirit of celebration with wholesome fresh ingredients and creamy goodness, this recipe is your go-to. Gather your family and friends, whip up this beauty, and watch those smiles light up the room with every bite!
Print
No-Bake Cheesecake Flag Cake Recipe
- Prep Time: 30 minutes
- Cook Time: 0 minutes
- Total Time: 3 hours 30 minutes
- Yield: 1 (9×11-inch) cheesecake
- Category: Dessert
- Method: No-Cook
- Cuisine: American
- Diet: Vegetarian
Description
This No-Bake Cheesecake Flag Cake is a patriotic dessert perfect for celebrations. It features a chocolate-graham cracker crust topped with a fluffy cream cheese and mascarpone filling, decorated beautifully with fresh strawberries and blueberries arranged to resemble the American flag. With no baking required, it’s easy to prepare and impresses with its vibrant and festive presentation.
Ingredients
Crust
- 1 ½ cups finely crushed graham cracker crumbs
- ¼ cup white sugar
- 2 tablespoons unsweetened cocoa powder
- 6 tablespoons butter, melted
Filling
- 1 cup cream cheese at room temperature
- 1 cup mascarpone cheese at room temperature
- 2 teaspoons grated lemon zest
- 2 teaspoons lemon juice
- 1 teaspoon vanilla extract
- ⅓ cup white sugar
- 1 ¼ cups cold heavy whipping cream
Topping
- 20 large fresh strawberries, hulled and halved lengthwise
- 24 large fresh blueberries
Instructions
- Prepare Crust: Combine graham cracker crumbs, 1/4 cup sugar, cocoa powder, and melted butter in a bowl until the mixture is crumbly and well blended.
- Set Crust: Press the crust mixture evenly into the bottom of a 9×11-inch baking dish. Cover with plastic wrap and refrigerate for about 30 minutes to set.
- Make Cheese Mixture: In a bowl, mix cream cheese and mascarpone cheese until smooth. Stir in lemon zest, lemon juice, and vanilla extract until fully incorporated.
- Whip Cream: In a separate bowl, whisk 1/3 cup sugar into cold heavy cream until soft peaks form. Gently fold the whipped cream into the cheese mixture until the filling is soft and fluffy.
- Assemble Cheesecake: Spoon the filling over the chilled crust, spreading evenly. Tap the pan gently to settle the layers. Cover and refrigerate for at least 3 hours until set.
- Arrange Strawberries: Starting at the bottom long edge, place strawberry halves with pointed ends to the right in a horizontal line. Add additional stripes of strawberries, leaving a square space in the upper left corner.
- Complete Strawberry Stripes: Create more horizontal strawberry stripes, ensuring there is a clear square space at the top left for blueberries.
- Add Blueberries: Fill the reserved square space with blueberries placed closely together with the blossom ends facing up to replicate the flag’s blue field.
- Serve: Cut the cheesecake into squares and serve chilled.
Notes
- Use room temperature cream cheese and mascarpone for smooth mixing.
- Ensure the heavy cream is cold before whipping for best results.
- Gently fold the whipped cream into the cheese mixture to maintain fluffiness.
- Decorate immediately before serving to maintain fresh fruit appearance.
- Refrigerate leftovers promptly to maintain freshness.


