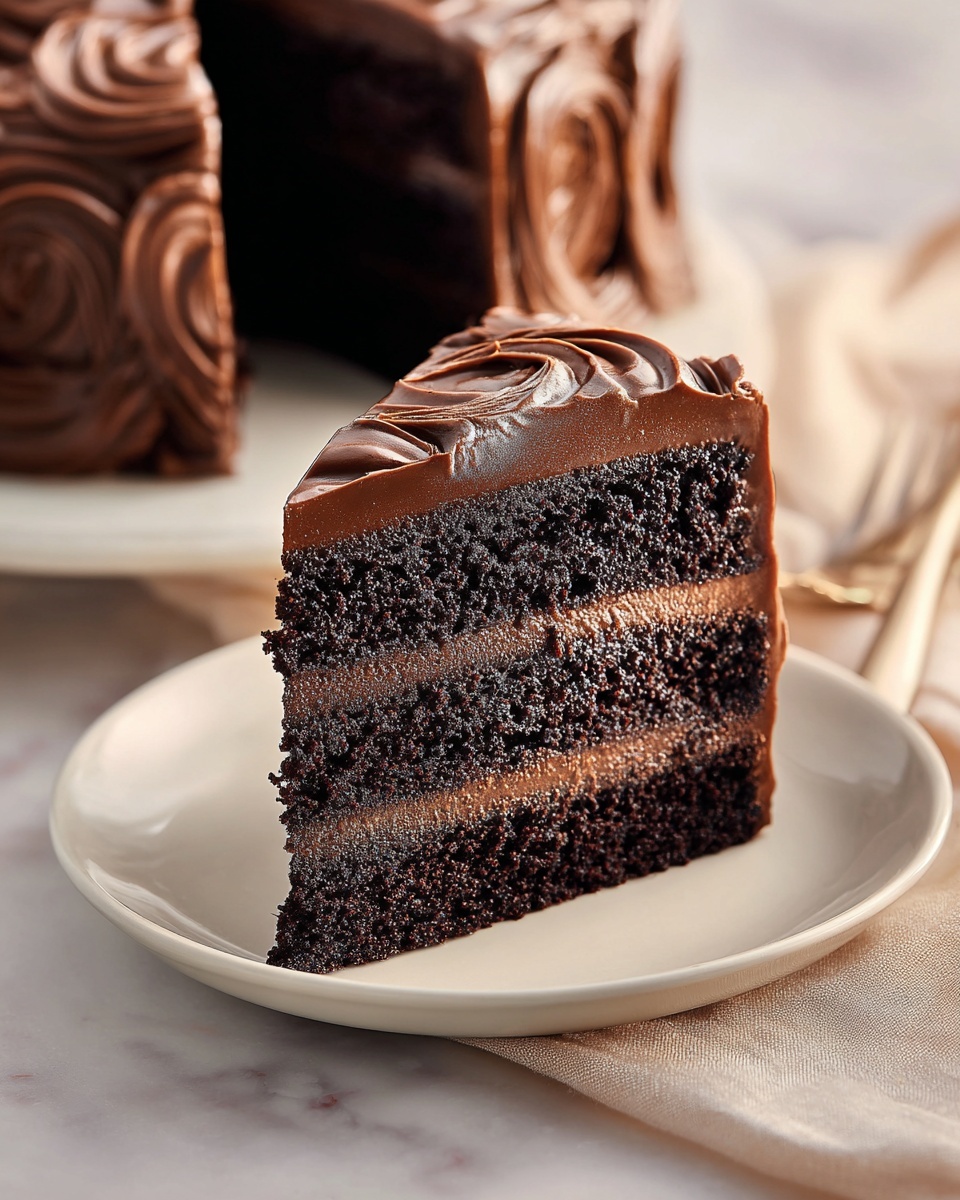
If you have a serious sweet tooth and a love for cake that feels like a cozy, chocolatey hug, then you need to try Matilda’s Rich Chocolate Cake Recipe. This decadent cake offers a perfect balance of moist, fluffy crumb and deep chocolate flavor, layered with an indulgent ganache that will have everyone asking for seconds. It’s the kind of dessert that makes any ordinary day feel special, with a texture and richness that only come from tried-and-true ingredients and careful techniques.
Ingredients You’ll Need
The magic of Matilda’s Rich Chocolate Cake Recipe starts with simple, everyday ingredients, each carefully chosen to create a moist and tender crumb, rich flavor, and luscious frosting. None of these are complicated, but together, they build the foundation for an irresistible cake you’ll want to make again and again.
- 1 ¾ cups all-purpose flour: Provides structure and a soft base for the cake’s crumb.
- 2 cups granulated sugar: Sweetens the cake while helping with texture and moistness.
- ¾ cup unsweetened cocoa powder: Brings intense chocolate flavor and rich color.
- 1 ½ teaspoons baking powder: Helps the cake rise for a light, fluffy texture.
- 1 ½ teaspoons baking soda: Works with baking powder to add lift and create a tender crumb.
- 1 teaspoon salt: Enhances all the flavors, balancing the sweetness and chocolate.
- 2 large eggs, room temperature: Bind ingredients together and add richness.
- 1 cup whole milk: Adds moisture and keeps the cake soft.
- ½ cup vegetable oil: Keeps the cake tender and moist for days.
- 2 teaspoons vanilla extract: Adds warmth and depth to the chocolate.
- 1 cup boiling water: Intensifies the cocoa flavor and creates a smooth batter.
- 1 cup heavy cream: Forms the base for the silky chocolate ganache.
- 8 oz semi-sweet chocolate, finely chopped: Gives the ganache its rich, melt-in-your-mouth quality.
- 2 tablespoons unsalted butter: Adds creaminess and shine to the ganache.
How to Make Matilda’s Rich Chocolate Cake Recipe
Step 1: Prepare Your Oven and Pans
Start by preheating your oven to 350°F (175°C). Grease two 9-inch round cake pans and line the bottoms with parchment paper for easy release. This ensures your beautiful cake layers come out smooth and intact.
Step 2: Mix Dry Ingredients
In a large bowl, whisk together the flour, sugar, cocoa powder, baking powder, baking soda, and salt. Mixing these first ensures your leavening agents and cocoa are evenly distributed for a perfect rise and even flavor throughout the cake.
Step 3: Combine Wet Ingredients
In another bowl, beat the eggs, milk, vegetable oil, and vanilla extract until smooth and well combined. The room temperature eggs and milk help create a smooth batter with the right consistency.
Step 4: Create the Batter
Slowly add the wet ingredients to the dry mixture, stirring gently to blend. Then carefully whisk in the boiling water. Yes, boiling water! It may sound unusual, but it brings out the deep chocolate flavor and makes the batter slightly thin, which results in a moist cake that practically melts in your mouth.
Step 5: Bake the Cakes
Pour the batter evenly into the prepared pans and bake for 30 to 35 minutes, or until a toothpick inserted in the center comes out clean. Once done, remove the cakes from the oven and let them cool in their pans for 10 minutes before transferring them to a wire rack to cool completely—this step is crucial for a clean, beautiful finish when frosting.
Step 6: Make the Chocolate Ganache
While the cake cools, heat the heavy cream in a small saucepan until it just begins to simmer. Pour the hot cream over the chopped semi-sweet chocolate in a heatproof bowl and let it sit for a minute. Then stir gently until you have a smooth, glossy ganache. Whisk in the butter for extra richness and a silky texture. Allow the ganache to cool slightly until it thickens enough to spread, but is still pourable.
Step 7: Assemble Your Cake
Place one cake layer on your serving plate and generously spread some ganache over the top. Gently place the second layer on top and pour the remaining ganache over the cake, letting it drip enticingly down the sides. Use an offset spatula to smooth the top for a professional look.
How to Serve Matilda’s Rich Chocolate Cake Recipe
Garnishes
The simplicity of this cake begs for elegant, complementary garnishes. Fresh berries like raspberries or strawberries add a bright, tangy contrast, while a dusting of powdered sugar or cocoa powder gives a pretty finishing touch. For a touch of crunch, sprinkle shaved chocolate or toasted nuts on top. These little extras can elevate your presentation and add delightful textures.
Side Dishes
Matilda’s Rich Chocolate Cake Recipe is so rich and satisfying that it often shines best on its own. However, pairing it with a lightly whipped cream, vanilla ice cream, or a scoop of coffee-flavored gelato adds a creamy balance that rounds out the indulgence beautifully. A simple cup of freshly brewed coffee or a bold red wine also pairs wonderfully and enhances the chocolate experience.
Creative Ways to Present
For special occasions, consider decorating the cake with edible gold leaf for a touch of glamour or fresh mint leaves for color and aroma. You can also cut the cake into petite squares for a charming dessert buffet, or serve it layered with fresh fruit compote between the layers for an extra burst of flavor and color. Presentation can be as simple or as fancy as you like; Matilda’s Rich Chocolate Cake Recipe holds its own every time.
Make Ahead and Storage
Storing Leftovers
Once frosted, store your chocolate cake covered at room temperature for up to two days to maintain its moistness. If your kitchen is warm, keeping it in the fridge is fine, but bring it to room temperature before serving to ensure that luscious ganache softens beautifully.
Freezing
This cake freezes wonderfully. Wrap each cake layer tightly in plastic wrap and then aluminum foil before freezing for up to three months. When ready to enjoy, thaw the layers overnight in the refrigerator and then assemble and frost the cake fresh for the best texture and flavor.
Reheating
While the cake is best served at room temperature, you can microwave single slices for 10 to 15 seconds if you prefer a warm bite. This brings out the chocolate aroma and softens the ganache slightly, making each mouthful even more indulgent.
FAQs
Can I use milk alternatives in Matilda’s Rich Chocolate Cake Recipe?
Absolutely! You can substitute whole milk with almond, soy, or oat milk. Just make sure the alternative is unsweetened to avoid altering the cake’s sweetness. The texture might shift slightly, but the cake will still be delicious.
Is this cake suitable for beginners?
Yes, definitely. Matilda’s Rich Chocolate Cake Recipe is straightforward, with simple steps and common ingredients. Even if you’re new to baking, following the process carefully will result in a stunning cake you can be proud of.
Can I make this cake gluten-free?
You can try using a 1-to-1 gluten-free all-purpose flour blend. Since this cake relies on specific leavening ratios, it’s best to use a trusted gluten-free flour that contains xanthan gum or a similar binder to keep the crumb tender and moist.
What’s the best way to chop chocolate for the ganache?
Using a sharp knife, finely chop the semi-sweet chocolate into small, even pieces. This helps the chocolate melt smoothly when combined with the hot cream. Avoid chocolate chips, as they have stabilizers that can affect the ganache texture.
Can I make the ganache ahead of time?
Yes! You can prepare the ganache a day in advance and refrigerate it. Before using, let it come to room temperature and gently warm it if needed to reach the right spreading consistency.
Final Thoughts
If you love chocolate cake that feels like a rich, comforting embrace, Matilda’s Rich Chocolate Cake Recipe is an absolute must-try. It strikes the perfect balance between classic flavors and luxurious texture, making every bite a little celebration. Once you make it, you might find it becoming your go-to recipe for birthdays, holidays, or just because. So go ahead, dive into the wonderful world of homemade chocolate cake with Matilda’s recipe guiding the way—you’re going to love every morsel.
Print
Matilda’s Rich Chocolate Cake Recipe
- Prep Time: 20 minutes
- Cook Time: 35 minutes
- Total Time: 55 minutes
- Yield: 12 servings
- Category: Dessert
- Method: Baking
- Cuisine: American
Description
Matilda’s Chocolate Cake is a rich, moist, and indulgent dessert perfect for chocolate lovers. This classic chocolate layer cake combines a tender crumb with deep cocoa flavor and a luscious chocolate ganache frosting made with heavy cream, semi-sweet chocolate, and butter. It’s ideal for celebrations or anytime you crave a decadent homemade treat.
Ingredients
For the Cake:
- 1 ¾ cups all-purpose flour
- 2 cups granulated sugar
- ¾ cup unsweetened cocoa powder
- 1 ½ teaspoons baking powder
- 1 ½ teaspoons baking soda
- 1 teaspoon salt
- 2 large eggs, room temperature
- 1 cup whole milk
- ½ cup vegetable oil
- 2 teaspoons vanilla extract
- 1 cup boiling water
For the Ganache Frosting:
- 1 cup heavy cream
- 8 oz semi-sweet chocolate, finely chopped
- 2 tablespoons unsalted butter
Instructions
- Preheat and Prepare Pans: Preheat your oven to 350°F (175°C). Grease and flour two 9-inch round cake pans to prevent sticking.
- Mix Dry Ingredients: In a large mixing bowl, sift together the all-purpose flour, granulated sugar, cocoa powder, baking powder, baking soda, and salt. Ensure these ingredients are well combined for an even crumb.
- Combine Wet Ingredients: In a separate bowl, whisk together the eggs, whole milk, vegetable oil, and vanilla extract until smooth and homogeneous.
- Incorporate Wet and Dry Ingredients: Gradually add the wet mixture to the dry ingredients, stirring gently until the batter is smooth and consistent without any lumps.
- Add Boiling Water: Carefully stir in the boiling water into the batter. The batter will be thin, but this step is essential to activate the cocoa and produce a moist cake.
- Bake the Cake: Divide the batter evenly between the prepared pans. Bake in the preheated oven for about 30 to 35 minutes or until a toothpick inserted in the center comes out clean.
- Cool the Cakes: Remove the cakes from the oven and let them cool in the pans for 10 minutes. Then turn them out onto wire racks to cool completely before frosting.
- Prepare Ganache Frosting: Heat the heavy cream in a small saucepan over medium heat until it begins to simmer, but do not boil. Remove from heat and pour over the chopped semi-sweet chocolate in a heatproof bowl. Let it sit for 5 minutes, then whisk until smooth and glossy. Stir in the unsalted butter until fully incorporated.
- Assemble the Cake: Place one cake layer on a serving plate and spread a layer of ganache over the top. Place the second layer on top and coat the entire cake with the ganache, smoothing it out with a spatula for a beautiful finish.
- Chill and Serve: Refrigerate the assembled cake for at least 30 minutes to set the ganache. Bring to room temperature before serving to enjoy the best flavor and texture.
Notes
- Make sure eggs are at room temperature to help with batter consistency.
- Sifting dry ingredients helps avoid lumps, leading to a lighter cake.
- Boiling water must be mixed in carefully to avoid cooking the eggs or curdling the batter.
- The ganache sets firm after chilling; if too hard, leave cake at room temperature before serving.
- Store leftover cake covered in the refrigerator for up to 3 days.
- For a more intense chocolate flavor, use high-quality cocoa powder and chocolate.


