
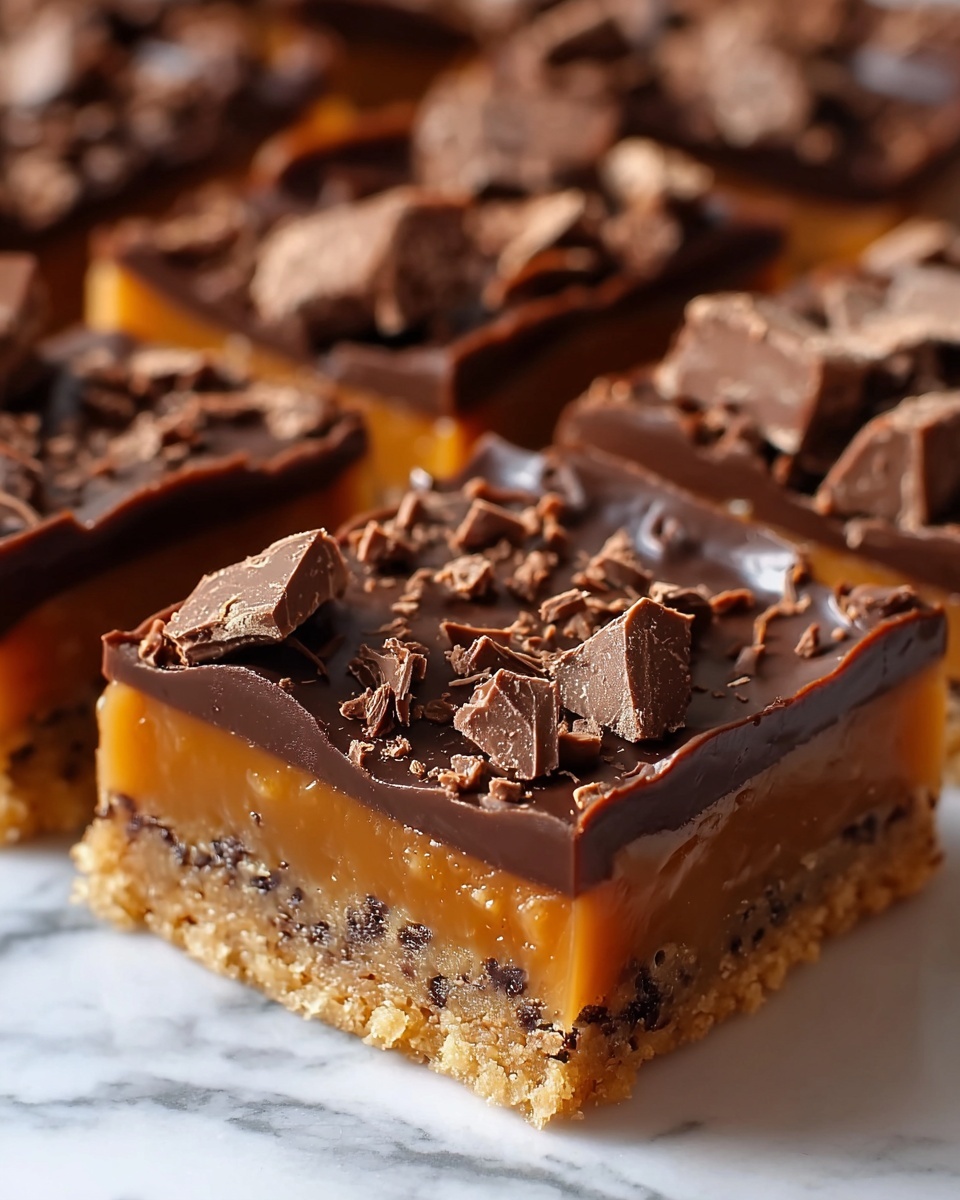
There is something truly irresistible about the Butterfinger Caramel Bars with Layers of Sweet Crunch and Chocolate Recipe. These bars capture the perfect harmony of a buttery crust, luscious caramel, and crunchy Butterfinger candy all nestled beneath a decadent chocolate topping. If you love treats that combine texture, sweetness, and rich flavor in every bite, this recipe will quickly become a beloved staple in your dessert rotation.
Ingredients You’ll Need
The magic of these bars lies in a handful of simple, everyday ingredients that each play a crucial role in building the delightful layers. From the creamy sweetness of butter and caramel to the satisfying crunch of Butterfinger candy, these components come together effortlessly to create an unforgettable taste experience.
- Unsalted butter (1 cup softened + 1/2 cup cubed): Adds rich creaminess and helps form the tender crust and smooth caramel mixture.
- Light brown sugar (1 cup, packed): Brings warmth and depth of flavor with its molasses notes, perfectly balancing the sweet layers.
- Vanilla extract (1 teaspoon): Enhances all the other flavors with its subtle, sweet aroma.
- All-purpose flour (2 cups): Provides structure to the buttery base and crumbly topping, essential for that satisfying bite.
- Baking powder (1/2 teaspoon): Adds a tiny lift to the dough, keeping the base light and crisp.
- Salt (1/4 teaspoon): Balances sweetness and heightens the overall flavor complexity.
- Sweetened condensed milk (14-ounce can): Delivers silky sweetness and richness to the caramel filling.
- Caramel candies (1 cup, unwrapped): Melt down for a smooth, luscious caramel layer that’s pure indulgence.
- Crushed Butterfinger candy bars (1 cup + 1/2 cup divided): These bring the iconic crispy, sweet crunch that defines this recipe’s signature texture.
- Semi-sweet chocolate chips (1 cup): Melted into a glossy topping, adding bittersweet chocolate contrast on every bite.
How to Make Butterfinger Caramel Bars with Layers of Sweet Crunch and Chocolate Recipe
Step 1: Preparing the Base
Begin by preheating your oven to 350°F (175°C) and lining a 9×13-inch pan with parchment paper, leaving an overhang for easy bar removal. In a large mixing bowl, cream together the softened butter and brown sugar until the mixture is fluffy and light. Stir in the vanilla extract, then add the flour, baking powder, and salt. Mix just until combined and crumbly—this dough will form the bottom layer and the crumbly topping.
Step 2: Baking the Bottom Layer
Press two-thirds of the dough evenly into the bottom of your prepared pan for an even, firm crust. Bake this base for about 10 to 12 minutes, until it starts to turn a lovely light gold. This initial bake sets the stage for crispness and flavor that complements the gooey caramel later.
Step 3: Making the Caramel Filling
While the base is baking, gently melt the cubed butter with the caramel candies over low heat. Stir consistently to get a smooth, creamy mixture. Once melted, whisk in the sweetened condensed milk and continue stirring until thickened and perfectly blended. This luscious caramel layer is the glue that holds the sweet, crunchy textures together.
Step 4: Assembling the Layers
Pour the warm caramel filling evenly over the semi-baked crust, spreading it gently to cover the surface. Next, sprinkle 1/2 cup of the crushed Butterfinger candy bars over the caramel for an irresistible, crunchy surprise. Then, crumble the reserved one-third of dough over the top, making sure to cover most of the caramel layer for a buttery, crumble finish.
Step 5: Baking the Bars
Return the fully assembled pan to the oven and bake for 20 to 25 minutes, or until the crumble topping is golden brown and the edges are bubbling with caramel goodness. The aroma at this point is absolutely mouthwatering!
Step 6: Adding the Chocolate Topping
Remove the bars from the oven and immediately sprinkle the semi-sweet chocolate chips over the hot surface. Let them sit for 2 to 3 minutes until they soften, then spread the melted chocolate evenly across the top. Finally, sprinkle the remaining 1/2 cup of crushed Butterfinger candy onto the chocolate layer for extra texture and eye-catching crunch.
Step 7: Cooling and Serving
Allow your Butterfinger Caramel Bars with Layers of Sweet Crunch and Chocolate Recipe to cool completely in the pan. You can leave them on the countertop or pop them in the fridge for quicker setting. Once firm, lift them out using the parchment overhang and slice into generous squares ready for sharing—or savoring all by yourself!
How to Serve Butterfinger Caramel Bars with Layers of Sweet Crunch and Chocolate Recipe
Garnishes
For an added touch of elegance and flavor, consider topping your bars with a light dusting of powdered sugar or a drizzle of caramel or chocolate sauce right before serving. A sprinkle of flaky sea salt can also beautifully offset the sweetness and highlight the chocolate and caramel layers.
Side Dishes
These bars stand as stars on their own but also shine when paired with a scoop of vanilla ice cream or a dollop of whipped cream. A cup of hot coffee or rich espresso enhances the dessert’s decadent chocolate and caramel notes, making each bite feel even more indulgent.
Creative Ways to Present
For a party or special occasion, cut the bars into bite-sized squares and place them on a decorative platter with a few whole Butterfinger candies for a playful nod to the ingredients. You could also layer pieces in a clear glass trifle dish, alternating with whipped cream and chopped nuts for a stunning dessert parfait with all the favorite flavors.
Make Ahead and Storage
Storing Leftovers
Leftover Butterfinger Caramel Bars with Layers of Sweet Crunch and Chocolate Recipe keep wonderfully in an airtight container at room temperature for up to 3 days. After that, refrigeration helps maintain freshness for up to a week, though bring them back to room temperature before serving for the best texture.
Freezing
These bars freeze beautifully! Wrap individual pieces tightly in plastic wrap and place them in a freezer-safe container or bag. They will keep well for up to 2 months. Thaw overnight in the refrigerator, then bring to room temperature before enjoying.
Reheating
If you’d like to enjoy warm bars, pop a piece in the microwave for about 15 seconds, or briefly warm in a low-temperature oven until the chocolate softens and the caramel slightly melts again. This warm, gooey treat tastes just like fresh from the oven!
FAQs
Can I use a different candy instead of Butterfinger?
Absolutely! While Butterfinger candy bars create that iconic sweet and crunchy texture unique to this recipe, feel free to experiment with other crunchy, peanut butter-flavored or toffee-based candies to personalize your bars.
Is it necessary to use parchment paper?
Using parchment paper makes removing the bars from the pan so much easier and helps prevent sticking. If you don’t have parchment, thoroughly grease the pan instead, but be careful when lifting the bars out.
Can I make these bars gluten-free?
You can substitute the all-purpose flour with a gluten-free baking flour blend, but check that it includes xanthan gum for structure. The texture might differ slightly, but the delicious layers of sweet crunch and chocolate will still shine.
How do I know when the bars are done baking?
The topping should be golden brown and the edges will look bubbly and set. The bars might still be soft in the center but will firm up as they cool, especially after refrigeration.
Can these bars be made ahead of time for a party?
Yes! These bars are perfect for making ahead since they store well and even taste better the next day after the flavors have had time to meld. Just slice them fresh before serving for the best presentation.
Final Thoughts
You really can’t go wrong with the Butterfinger Caramel Bars with Layers of Sweet Crunch and Chocolate Recipe. It’s a recipe that feels like a warm hug from the inside out, combining textures and flavors in ways that delight with each bite. If you’re ready to whip up a dessert that’s both fun and sophisticated, give this one a try—you might just find yourself craving these bars again and again!
Print
Butterfinger Caramel Bars with Layers of Sweet Crunch and Chocolate Recipe
- Prep Time: 15 minutes
- Cook Time: 40 minutes
- Total Time: 55 minutes
- Yield: 12 servings
- Category: Dessert
- Method: Baking
- Cuisine: American
Description
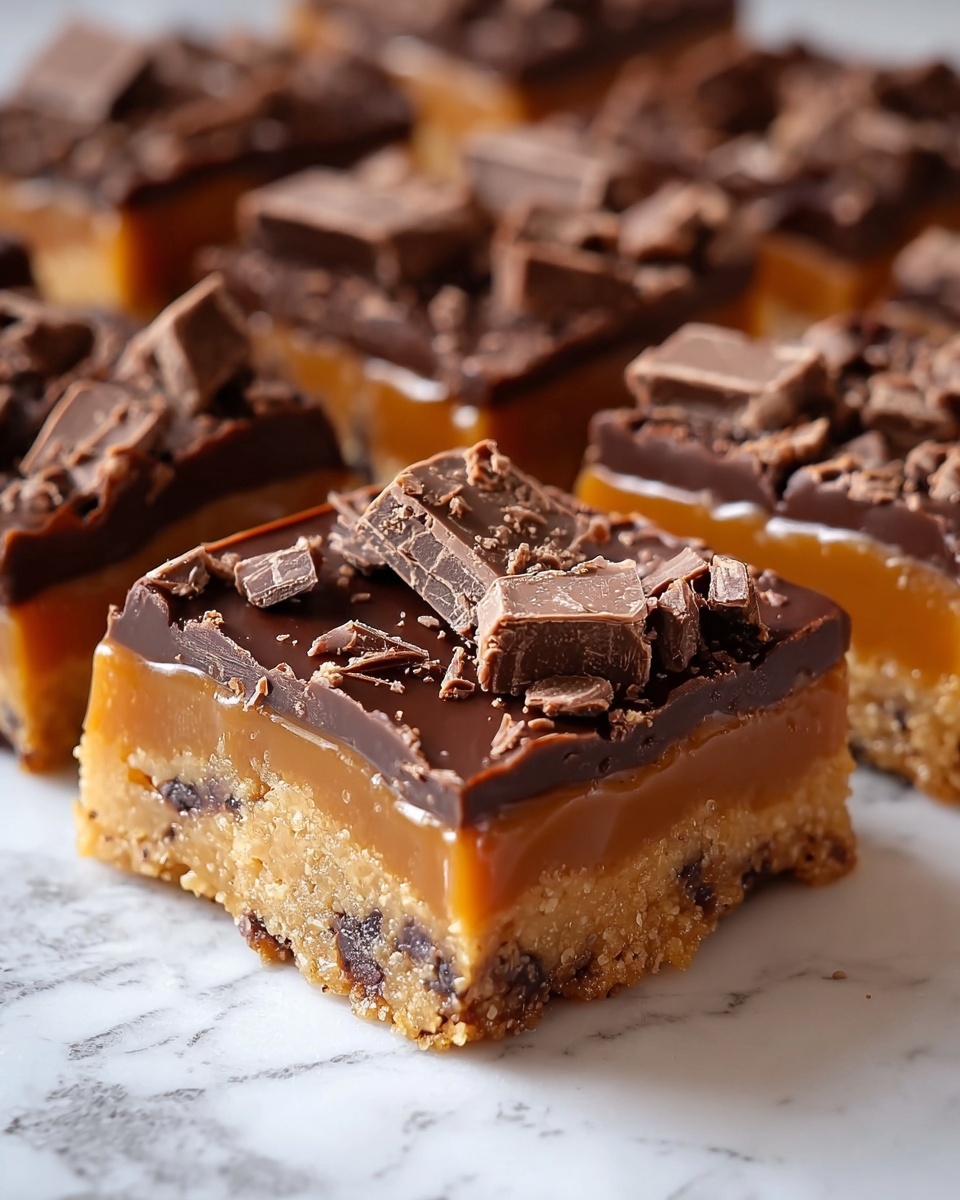
Delight in these buttery Butterfinger Caramel Bars featuring layers of sweet, crunchy Butterfinger candy, rich caramel, and a smooth chocolate topping. Perfect for satisfying your sweet tooth with a combination of textures and flavors baked to golden perfection.
Ingredients
Base Dough
- 1 cup (2 sticks) unsalted butter, softened
- 1 cup light brown sugar, packed
- 1 teaspoon vanilla extract
- 2 cups all-purpose flour
- 1/2 teaspoon baking powder
- 1/4 teaspoon salt
Caramel Filling
- 1 (14-ounce) can sweetened condensed milk
- 1/2 cup unsalted butter, cubed
- 1 cup caramel candies, unwrapped
Additional Layers and Topping
- 1 cup semi-sweet chocolate chips
- 1 cup crushed Butterfinger candy bars (divided into 1/2 cup + 1/2 cup)
Instructions
- Prepare the base: Preheat your oven to 350°F (175°C). Line a 9×13-inch baking pan with parchment paper, leaving an overhang on the sides for easy removal of the bars later.
- Cream the dough: In a large mixing bowl, cream together the softened butter and brown sugar until the mixture becomes light and fluffy. Stir in the vanilla extract.
- Mix dry ingredients: Add the all-purpose flour, baking powder, and salt to the butter mixture. Mix until the dough is crumbly and fully combined.
- Assemble the bottom layer: Press two-thirds of the dough evenly into the bottom of the prepared baking pan, creating a uniform base layer. Reserve the remaining one-third of dough for the topping.
- Bake the base: Place the pan in the oven and bake for 10-12 minutes or until the base is lightly golden. Remove from oven and set aside.
- Prepare the caramel filling: In a medium saucepan over low heat, melt the cubed butter and caramel candies together, stirring constantly until smooth and fully melted.
- Combine with condensed milk: Add the sweetened condensed milk to the melted caramel mixture and continue stirring until everything is fully combined and slightly thickened.
- Layer the bars: Pour the warm caramel mixture evenly over the baked base. Immediately sprinkle 1/2 cup of crushed Butterfinger candy bars over the caramel layer.
- Add the topping dough: Crumble the reserved one-third dough evenly on top, covering most of the caramel and Butterfinger layer.
- Bake the assembled bars: Return the pan to the oven and bake for 20-25 minutes or until the topping is golden brown and the edges are bubbly.
- Add the chocolate topping: Remove the bars from the oven and while still hot, sprinkle the semi-sweet chocolate chips evenly over the top. Let them sit for 2-3 minutes to soften.
- Spread the melted chocolate: Using a spatula, spread the softened chocolate chips evenly over the bars. Then sprinkle the remaining 1/2 cup of crushed Butterfinger candy bars on top for extra crunch and flavor.
- Cool and serve: Allow the bars to cool completely in the pan at room temperature, or chill them in the refrigerator to set faster before cutting into 12 servings.
Notes
- Using parchment paper with an overhang makes it easier to lift the bars out of the pan without breaking.
- Make sure to stir the caramel mixture constantly to avoid burning and achieve a smooth consistency.
- For quicker setting, refrigerate the bars after baking and topping with chocolate.
- You can substitute Butterfinger candy with other crunchy candy bars if desired for variation.
- Store any leftover bars in an airtight container at room temperature for up to 3 days or refrigerate for up to a week.
