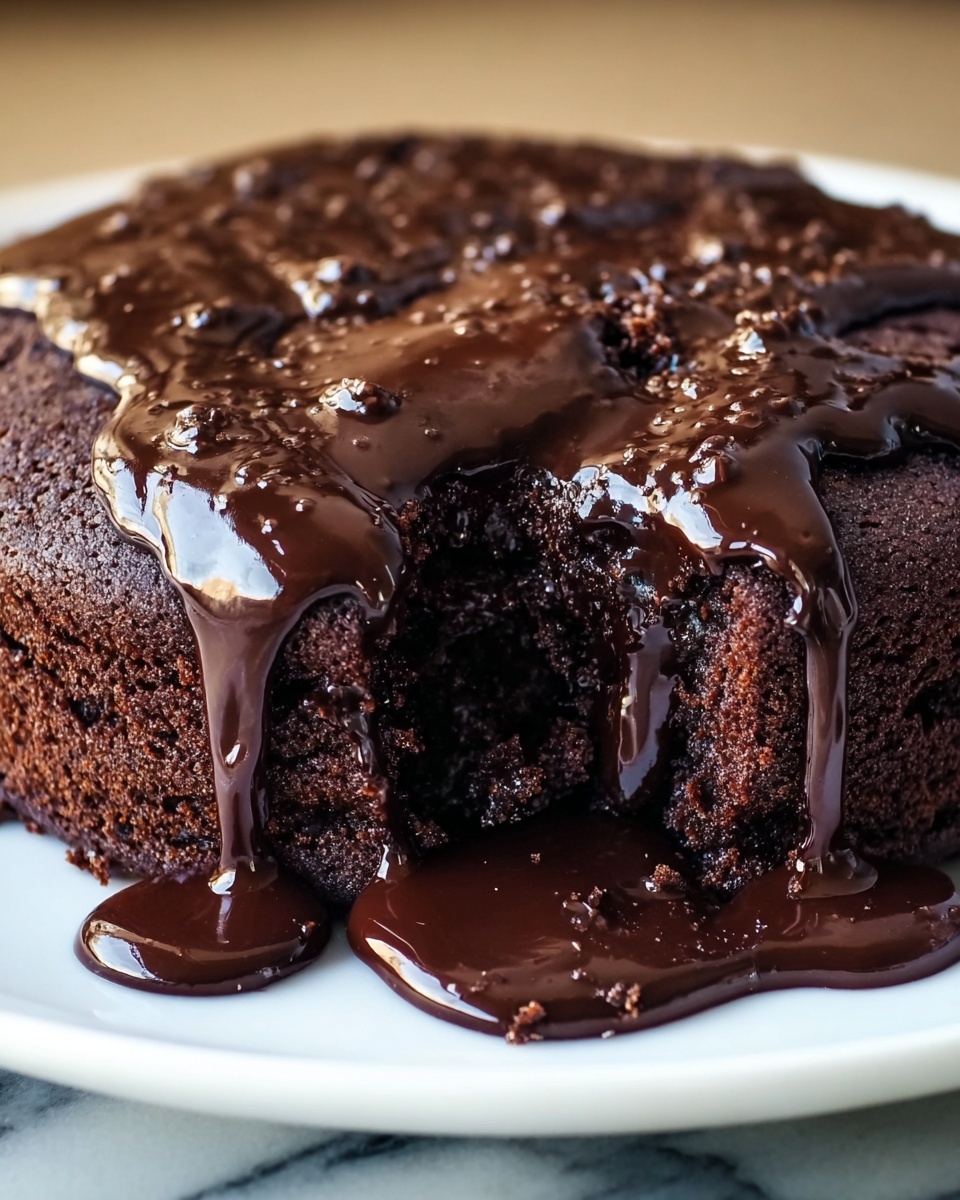
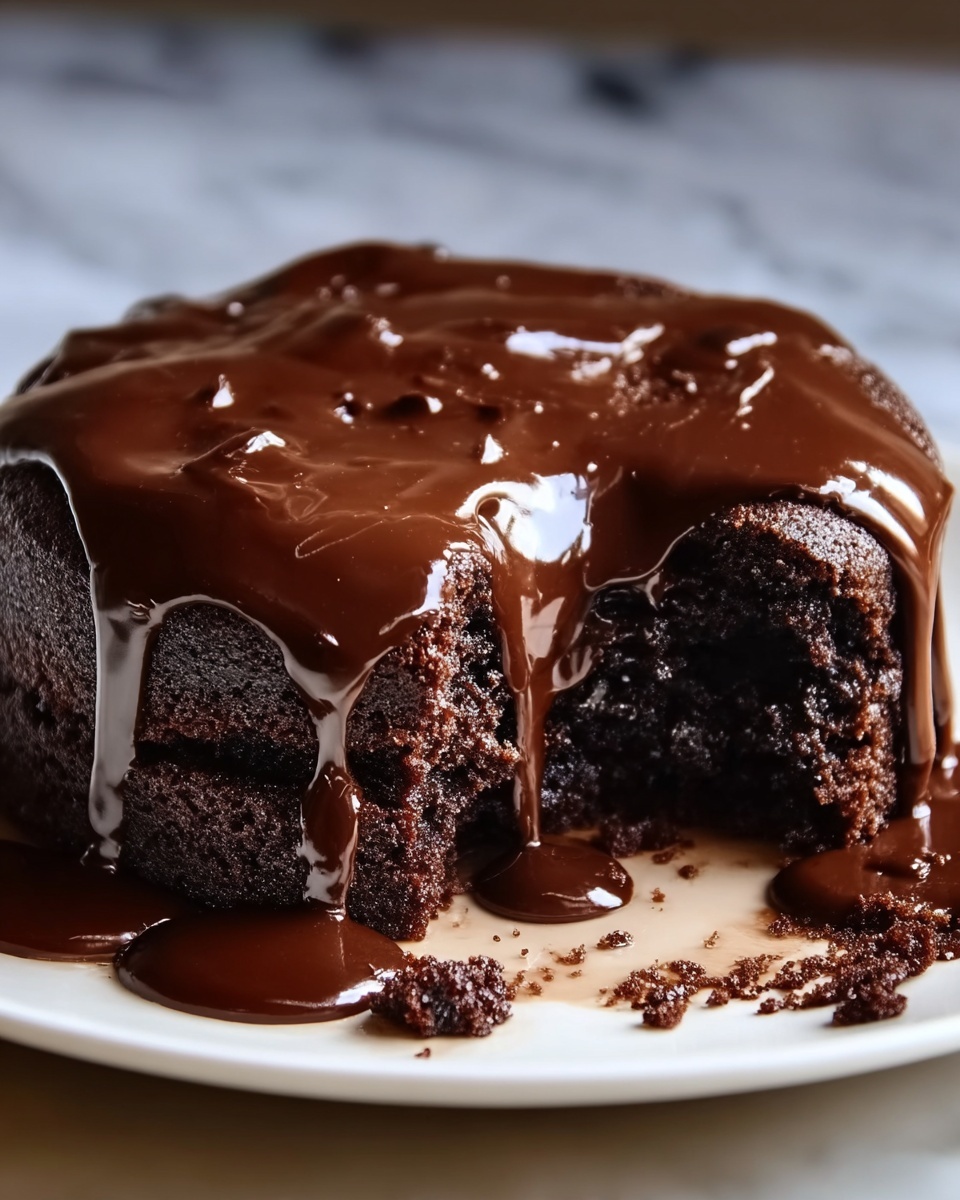
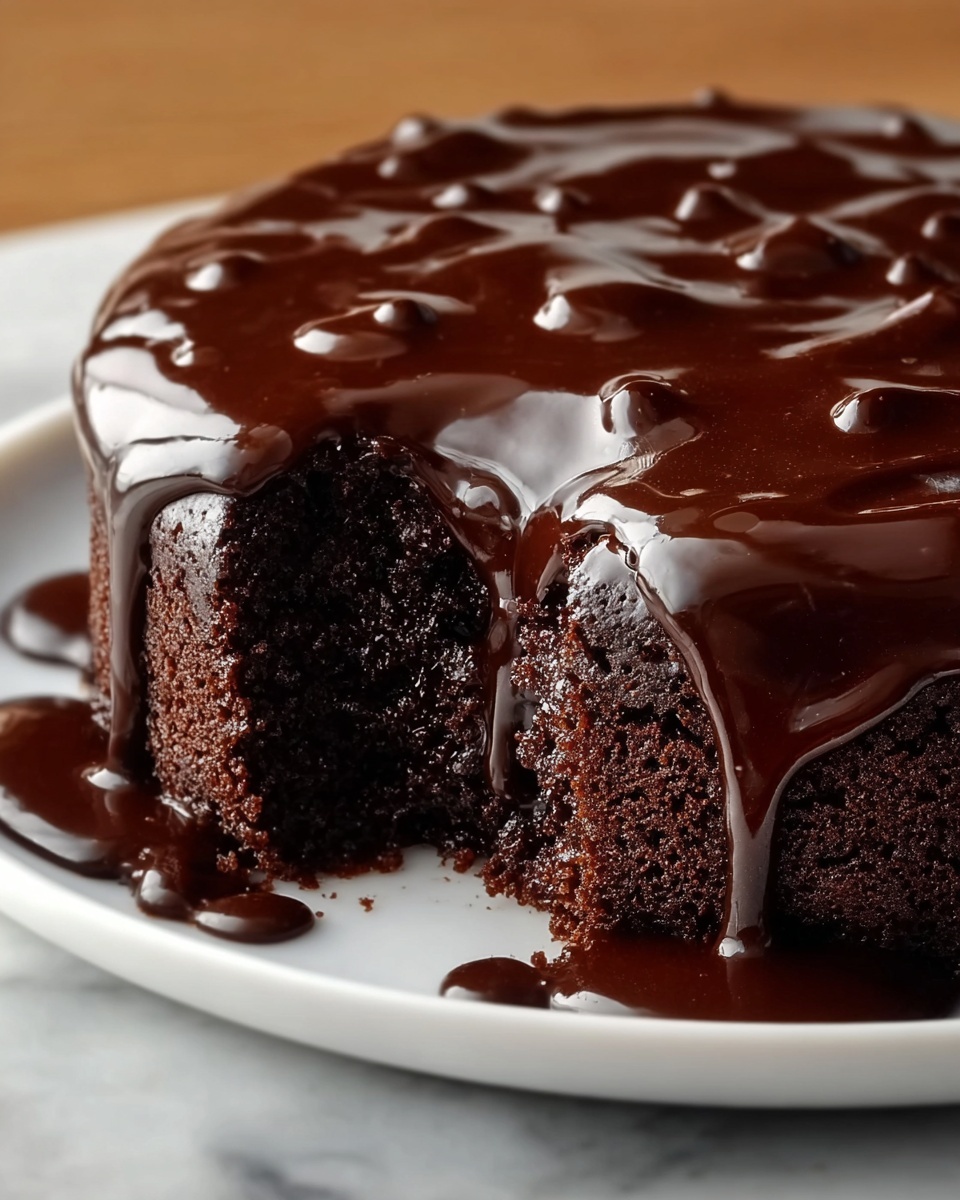
If you have a serious sweet tooth and love that perfect combo of rich chocolate and creamy filling, then this Chocolate Ooey Gooey Cake Recipe is your new best friend. Imagine biting into a warm, fudgy chocolate cake base topped with a luscious, buttery cream cheese layer that’s just slightly gooey in the center. This cake is not just a dessert; it’s a celebration of textures and flavors that will make any gathering instantly more memorable and every single bite utterly irresistible.
Ingredients You’ll Need
This Chocolate Ooey Gooey Cake Recipe relies on simple, pantry-friendly ingredients that come together to create a truly decadent treat. Each component plays a crucial role—the chocolate cake mix forms a moist, chocolatey foundation, while the cream cheese filling adds richness and a velvety texture that contrasts beautifully with the dense cake.
- Chocolate cake mix: The base of this cake, it provides deep chocolate flavor and a moist crumb with minimal effort.
- Unsalted butter: Used both melted for the cake batter and softened for the filling, it adds richness and helps achieve that tender texture.
- Large eggs: They bind the ingredients together and ensure the right structure for both the cake and the creamy filling.
- Vanilla extract: A splash of vanilla rounds out the flavors and enhances the sweetness naturally.
- Cream cheese: The star in the filling, contributing tanginess and creaminess for the gooey surprise inside.
- Powdered sugar: Sweetens and stabilizes the creamy filling, balancing the chocolate with just the right touch of sweetness.
How to Make Chocolate Ooey Gooey Cake Recipe
Step 1: Preheat and Prepare Your Pan
First things first, get your oven ready at 350°F (175°C), ensuring it’s fully heated. While waiting, grease a 9×13-inch baking dish or line it with parchment paper. This prep step guarantees the cake won’t stick and will lift out perfectly when baked.
Step 2: Mix the Cake Batter
In a medium bowl, whisk together the chocolate cake mix, melted butter, egg, and vanilla extract until the mixture is smooth and even. This batter will lay the groundwork for that rich chocolate goodness, so make sure it’s well combined before spreading it evenly into your prepared dish.
Step 3: Whip Up the Cream Cheese Filling
Take a separate bowl and beat the softened cream cheese with the softened butter until silky smooth. Then, add the powdered sugar, egg, and vanilla extract and mix everything until the filling is thick and creamy. This luscious topping will provide the balance of tangy sweetness that makes this cake so unique.
Step 4: Assemble Without Stirring
Spread the cream cheese filling gently and evenly over the chocolate cake layer in the pan. The key here is not to swirl or mix the two layers together; instead, keep them distinct so the “ooey gooey” texture really stands out after baking.
Step 5: Bake to Perfection
Slide your pan into the oven and bake for 40 to 45 minutes. You’ll know it’s done when the edges are set and have a beautiful golden hue, while the center retains that irresistibly soft and gooey texture that defines this cake.
Step 6: Let It Cool Slightly
After baking, allow the cake to rest in the pan for about 10 to 15 minutes. This cool-down time helps the cake set just enough to cut clean squares while keeping that heavenly gooey core intact.
Step 7: Serve and Enjoy!
Whether you choose to dive in warm or at room temperature, this cake shines either way. For a special touch, dust with powdered sugar or top with a scoop of your favorite vanilla ice cream to elevate the indulgence to something truly celebratory.
How to Serve Chocolate Ooey Gooey Cake Recipe
Garnishes
A simple dusting of powdered sugar adds an elegant, snowy finish that contrasts beautifully with the deep chocolate color. Fresh berries or a drizzle of warm chocolate or caramel sauce can add a fresh, tangy, or extra sweet note that complements the rich flavors perfectly.
Side Dishes
Pair this rich cake slice with cool vanilla ice cream or a dollop of whipped cream to balance the dense, creamy layers. Fresh fruit like raspberries or cherries can cut through the richness and refresh the palate in a delicious way.
Creative Ways to Present
For a crowd-pleaser, serve the cake squares on a platter garnished with edible flowers or mint leaves. You can also layer smaller pieces with ice cream in clear dessert cups for a fun, layered parfait effect that’s visually stunning and mouthwateringly good.
Make Ahead and Storage
Storing Leftovers
Store any leftover Chocolate Ooey Gooey Cake Recipe in an airtight container at room temperature for up to two days. For longer freshness, refrigeration is best and will keep the cake moist and flavors intact for about 4-5 days.
Freezing
You can freeze individual squares by wrapping them tightly in plastic wrap and placing them in a freezer-safe container. This cake freezes well for up to 2 months and is perfect for pulling out when you need a quick dessert fix.
Reheating
To enjoy the cake warm, thaw frozen pieces overnight in the fridge and then heat in the microwave for 15-20 seconds or until warmed through. This brings back that signature ooey gooey texture that makes this cake so delightful.
FAQs
Can I make this cake from scratch instead of using a box mix?
Absolutely! While the recipe is designed for convenience, you can use a homemade chocolate cake batter if you prefer. Just make sure the batter isn’t too thin, as the structure supports the cream cheese filling.
What kind of cream cheese is best to use?
Regular full-fat cream cheese is ideal for the filling because it provides the best texture and flavor. Avoid low-fat or whipped varieties, as they can alter the cake’s consistency.
Can I use a different size pan?
The 9×13-inch pan size works best to achieve the right thickness and gooey center. Using a smaller pan might result in longer baking, while a larger pan will yield a thinner cake that may bake faster and lose the ooey gooey texture.
Is it necessary to let the cake cool before cutting?
Yes, letting the cake cool for 10-15 minutes helps it set and makes slicing easier. Cutting it too early might cause the layers to run together and lose that distinct ooey gooey appeal.
How do I get the gooey center just right?
Keeping an eye on the bake time is key. Bake until the edges are set and the top is lightly golden but the center still jiggles slightly when gently shaken. This ensures the center stays soft and luscious.
Final Thoughts
This Chocolate Ooey Gooey Cake Recipe is a heartwarming dessert that feels like a big, delicious hug in every bite. Whether it’s for a family gathering or a simple weekend treat, it’s bound to bring smiles and happy sighs around the table. Trust me, once you try this recipe, it’s going to become one of your go-to favorites for satisfying your dessert cravings with ease and a touch of homemade love.
Print
Chocolate Ooey Gooey Cake Recipe
- Prep Time: 15 minutes
- Cook Time: 40-45 minutes
- Total Time: 55-60 minutes
- Yield: 12-16 servings
- Category: Dessert
- Method: Baking
- Cuisine: American
Description
This Chocolate Ooey Gooey Cake combines rich chocolate cake with a luscious cream cheese filling, creating a decadent dessert perfect for any occasion. The cake has a moist, gooey center with a slightly golden top, offering an irresistible texture and flavor that cake lovers will adore.
Ingredients
For the Cake:
- 1 box (15.25 oz) chocolate cake mix
- 1/2 cup unsalted butter, melted
- 1 large egg
- 1 teaspoon vanilla extract
For the Filling:
- 8 oz cream cheese, softened
- 1/2 cup unsalted butter, softened
- 1 (16 oz) powdered sugar
- 1 large egg
- 1 teaspoon vanilla extract
Instructions
- Preheat oven: Preheat your oven to 350°F (175°C). Grease a 9×13-inch baking dish or line it with parchment paper to prevent sticking and ensure easy removal.
- Prepare the cake layer: In a medium-sized bowl, combine the chocolate cake mix, melted butter, egg, and vanilla extract. Mix until all ingredients are well incorporated. Spread this chocolate batter evenly into the bottom of the prepared baking dish to form the base layer.
- Prepare the filling: In a separate bowl, beat the softened cream cheese and softened butter together until smooth and creamy. Gradually add the powdered sugar, then the egg, and vanilla extract, mixing continuously until the filling is smooth and silky in texture.
- Assemble the cake: Carefully spread the cream cheese filling evenly over the chocolate cake batter in the baking dish. Avoid mixing the layers together; just smooth the filling on top to create distinct layers.
- Bake: Place the baking dish in the preheated oven and bake for 40-45 minutes. Bake until the edges are set and the top is slightly golden while the center remains soft and gooey, giving the cake its signature ooey gooey texture.
- Cool: Remove the cake from the oven and allow it to cool in the pan for 10-15 minutes. This step helps the cake set slightly for easier slicing and serving.
- Serve: Cut the cake into squares and serve warm or at room temperature. For added decadence, dust with powdered sugar or top with a scoop of vanilla ice cream for an indulgent treat.
Notes
- Using softened cream cheese and butter for the filling ensures a smooth and creamy texture.
- Do not overbake; the center should remain slightly gooey for the signature texture.
- This cake is best served warm but can be enjoyed at room temperature as well.
- You can line the baking dish with parchment paper for easier cleanup and removal.
- Leftovers can be stored covered in the refrigerator for up to 3 days.

