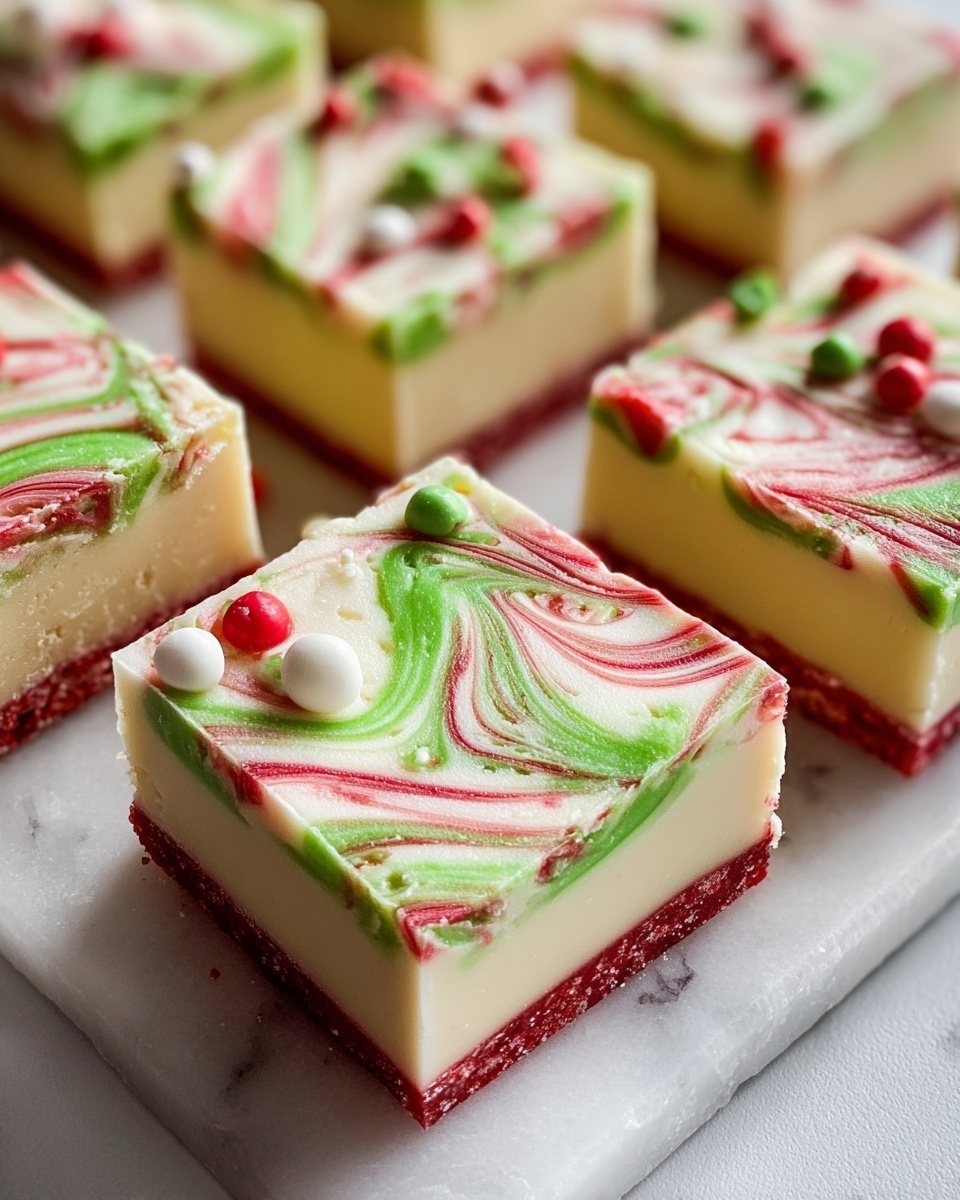
If you want to add a festive touch to your holiday celebrations that’s both delightful and easy to make, look no further than this Christmas Marbled White Chocolate Fudge Recipe. It combines the creamy sweetness of white chocolate with cheerful swirls of red and green, creating a stunning marbled effect that’s perfect for gifting or treating yourself. This recipe is wonderfully simple, calls for just a few ingredients, and results in slices of rich, melt-in-your-mouth fudge that capture the very spirit of Christmas in every bite.
Ingredients You’ll Need
Gathering the right ingredients is half the fun with this Christmas Marbled White Chocolate Fudge Recipe. Each element plays its role in flavor, texture, or festive appearance, making the result irresistible and visually charming.
- 3 cups white chocolate chips: The base of the fudge, offering that smooth, creamy sweetness that melts wonderfully on the tongue.
- 1 (14-ounce) can sweetened condensed milk: Adds luscious richness and a velvety texture that binds the fudge perfectly.
- 1/2 teaspoon vanilla extract: A splash of warmth and depth that elevates the white chocolate’s flavor without overpowering it.
- Red food coloring: Brings in the festive red swirls to make the fudge visually exciting and seasonally appropriate.
- Green food coloring: Complements the red with vibrant green swirls, completing the classic Christmas palette.
- 1/4 cup holiday sprinkles (optional): Adds a playful crunch and extra sparkle on top, but feel free to skip or customize them.
How to Make Christmas Marbled White Chocolate Fudge Recipe
Step 1: Prepare Your Pan
Start by lining an 8×8-inch baking dish with parchment paper. Be sure to leave some overhang on the edges — this little trick makes it so much easier to lift the fudge out once it’s set, giving you clean, perfect squares without any mess.
Step 2: Melt the Chocolate Mixture
Gently melt the white chocolate chips together with the sweetened condensed milk using a medium saucepan over low heat. Stir the mixture continuously until it is perfectly smooth and silky. Once off the heat, stir in the vanilla extract to infuse the mixture with a warm, fragrant note that complements the chocolate beautifully.
Step 3: Divide and Color
Now for the fun part! Pour the smooth white chocolate mixture evenly into three separate bowls. Tint one bowl with red food coloring and another with green. Leave the third bowl plain for the natural creamy white color. This color division sets the stage for your gorgeous marbled design.
Step 4: Create the Marbled Layers
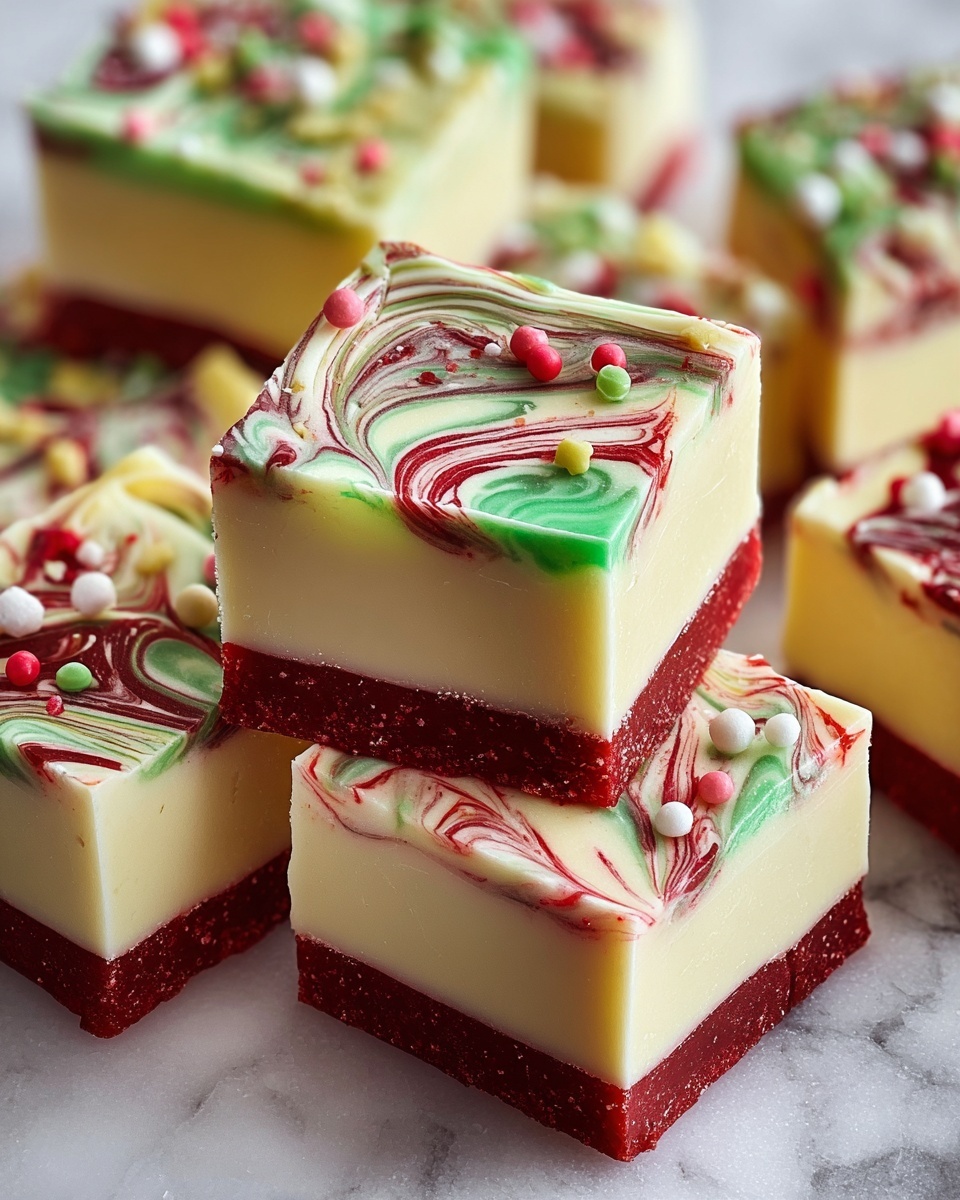
Pour the red fudge into your prepared pan first, then gently layer the plain fudge on top, followed by the green fudge. Take a knife and swirl the three colors together in a random pattern, creating that signature marbled look that’s as delightful to see as it is to eat.
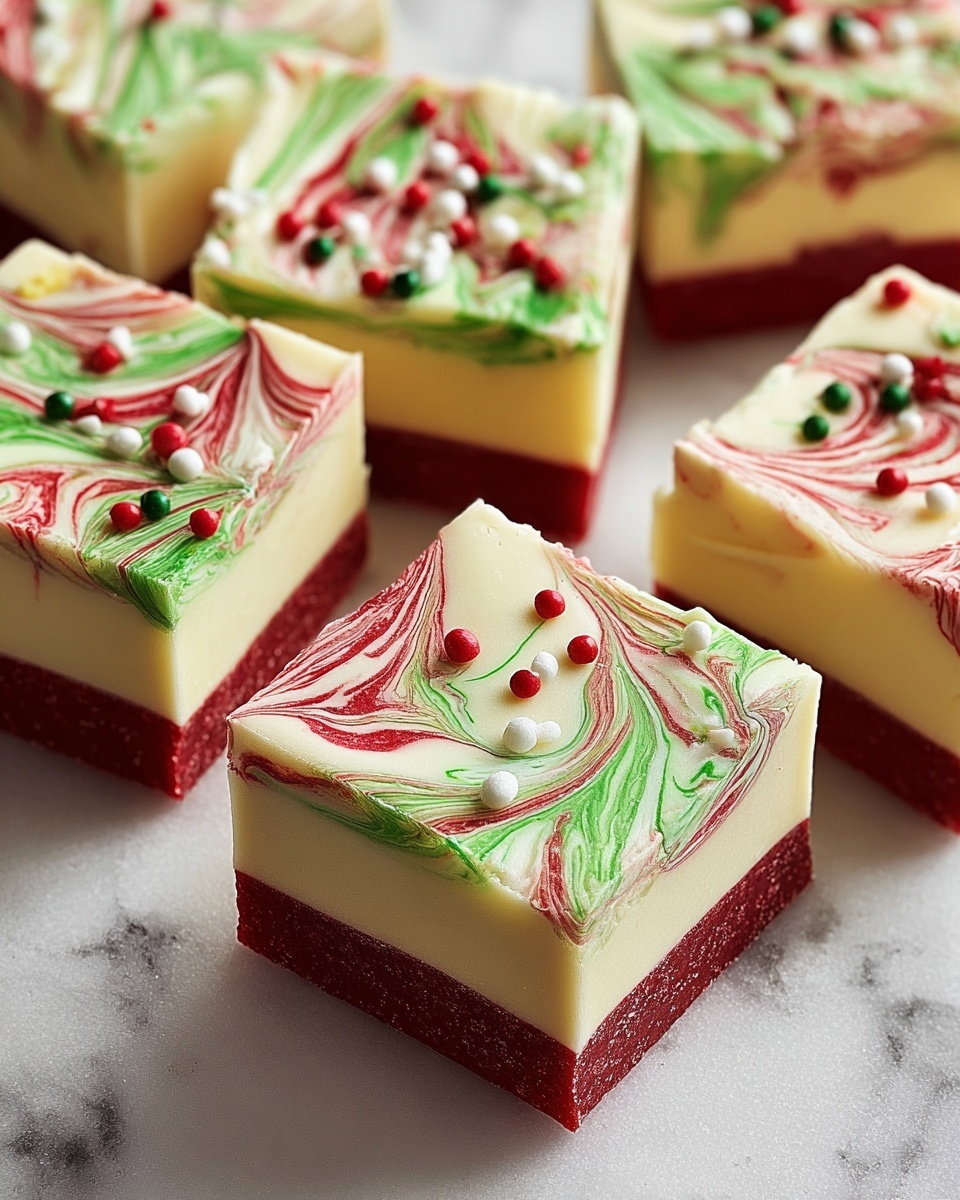
Step 5: Add Sparkle with Sprinkles
While the fudge is still warm and soft, generously sprinkle your holiday sprinkles across the surface. This step adds that extra festive flair and a little bit of texture to make each bite even more exciting and seasonal.
Step 6: Chill and Set
Place the fudge pan in the refrigerator and let it chill for at least two hours. This setting time allows the fudge to firm up and solidify, making it easier to lift out and cut into neat, impressive squares for sharing.
How to Serve Christmas Marbled White Chocolate Fudge Recipe
Garnishes
Top your fudge squares with festive garnishes such as crushed candy canes or chopped pistachios. These additions add a pop of contrasting flavor and texture, enhancing the fudgy sweetness and making the presentation even more captivating.
Side Dishes
Pair your Christmas fudge with a warm cup of spiced tea, rich coffee, or creamy hot chocolate. The contrast of hot drinks against the cool, sweet fudge creates a perfect holiday indulgence, perfect for sharing at gatherings or cozying up by the fire.
Creative Ways to Present
Consider layering your squares in a decorative tin with parchment paper between layers, or arrange them on a holiday-themed platter. Wrapping individual pieces in colorful foil or clear cellophane tied with ribbons makes adorable gifts or party favors that friends and family will adore.
Make Ahead and Storage
Storing Leftovers
You can keep your Christmas Marbled White Chocolate Fudge nicely fresh by storing it in an airtight container at room temperature for up to a week. Make sure it’s in a cool spot to avoid melting or softening too much.
Freezing
If you want to enjoy this Christmas Marbled White Chocolate Fudge Recipe beyond the holiday season, it freezes well. Wrap the fudge tightly in plastic wrap and then place it in an airtight container or freezer bag. It can be frozen for up to 3 months and thawed overnight in the fridge before serving.
Reheating
Fudge is best enjoyed chilled or at room temperature, so reheating isn’t typically necessary. However, if the fudge feels too firm, you can let it sit out for 10–15 minutes to soften slightly for easier eating without losing its texture or marbled effect.
FAQs
Can I use milk chocolate instead of white chocolate in this fudge?
While milk chocolate will work, it changes the color and flavor profile significantly, so you won’t achieve the same beautiful marbled white look. For the iconic Christmas Marbled White Chocolate Fudge Recipe, white chocolate is key.
Is it necessary to use sweetened condensed milk?
Yes, sweetened condensed milk is essential because it adds creaminess and helps the fudge set properly without crystallizing, ensuring that perfect smooth texture you expect.
Can I make this fudge vegan or dairy-free?
You can experiment with vegan white chocolate and dairy-free condensed milk alternatives, but results may vary slightly in texture and taste. It’s worth testing if you have dietary needs, but the classic recipe uses standard dairy ingredients.
What’s the best way to cut fudge without it crumbling?
Make sure the fudge is fully set and cold when cutting. Use a sharp knife warmed slightly under hot water, drying it before slicing for clean edges that minimize crumbling.
How long does this fudge stay fresh?
Stored properly in an airtight container at room temperature, your Christmas Marbled White Chocolate Fudge Recipe stays fresh and delicious for about 5 to 7 days. Refrigeration can extend freshness but may harden the texture slightly.
Final Thoughts
This Christmas Marbled White Chocolate Fudge Recipe is one of those festive treats that fills your kitchen with joy and your heart with holiday spirit. It’s easy to make, stunningly beautiful, and utterly delicious, perfect for sharing with loved ones or keeping as a sweet secret stash. Give it a try this season—you’ll be amazed at how a few simple ingredients can come together to create such a magical, memorable dessert.
Print
Christmas Marbled White Chocolate Fudge Recipe
- Prep Time: 10 minutes
- Cook Time: 0 minutes
- Total Time: 2 hours 10 minutes
- Yield: 24 pieces
- Category: Dessert
- Method: Stovetop
- Cuisine: American
- Diet: Vegetarian
Description
This festive Christmas Fudge recipe creates a creamy, colorful treat perfect for holiday gatherings. Combining rich white chocolate and sweetened condensed milk, the fudge is divided and tinted with red and green food coloring to create a beautiful marbled effect. Topped with holiday sprinkles, this no-bake fudge is easy to make and a crowd-pleaser for the season.
Ingredients
Main Ingredients
- 3 cups white chocolate chips
- 1 (14-ounce) can sweetened condensed milk
- 1/2 teaspoon vanilla extract
- Red food coloring
- Green food coloring
- 1/4 cup holiday sprinkles (optional, for decoration)
Instructions
- Prepare the Baking Dish: Line an 8×8-inch baking dish with parchment paper, making sure to leave an overhang for easy removal once the fudge is set.
- Melt Ingredients: In a medium saucepan over low heat, combine the white chocolate chips and sweetened condensed milk. Stir continuously until the mixture is smooth and fully melted. Remove from heat and stir in the vanilla extract for added flavor.
- Divide and Color: Pour the melted white chocolate mixture evenly into three separate bowls. Add red food coloring to one bowl, green food coloring to another, and leave the last bowl plain to retain its white color.
- Layer and Swirl: Pour the red-colored fudge mixture into the prepared baking dish first, followed by the plain fudge, and finally the green fudge. Use a knife to gently swirl the layers together to create a marbled visual effect.
- Add Decoration: While the fudge is still warm, sprinkle the holiday sprinkles evenly over the top for added festive flair and texture.
- Chill to Set: Place the dish in the refrigerator and chill for at least 2 hours or until the fudge is firm enough to cut. Once set, lift the fudge out using the parchment paper overhang and slice into 24 squares.
Notes
- To avoid burning the chocolate, melt the mixture over low heat and stir continuously.
- Use gel food coloring for more vibrant colors without altering the fudge’s consistency.
- For a variation, try adding crushed candy canes or nuts for extra texture.
- Leftovers can be stored in an airtight container in the refrigerator for up to one week.
- Allow fudge to come to room temperature for a few minutes before serving for best texture.


