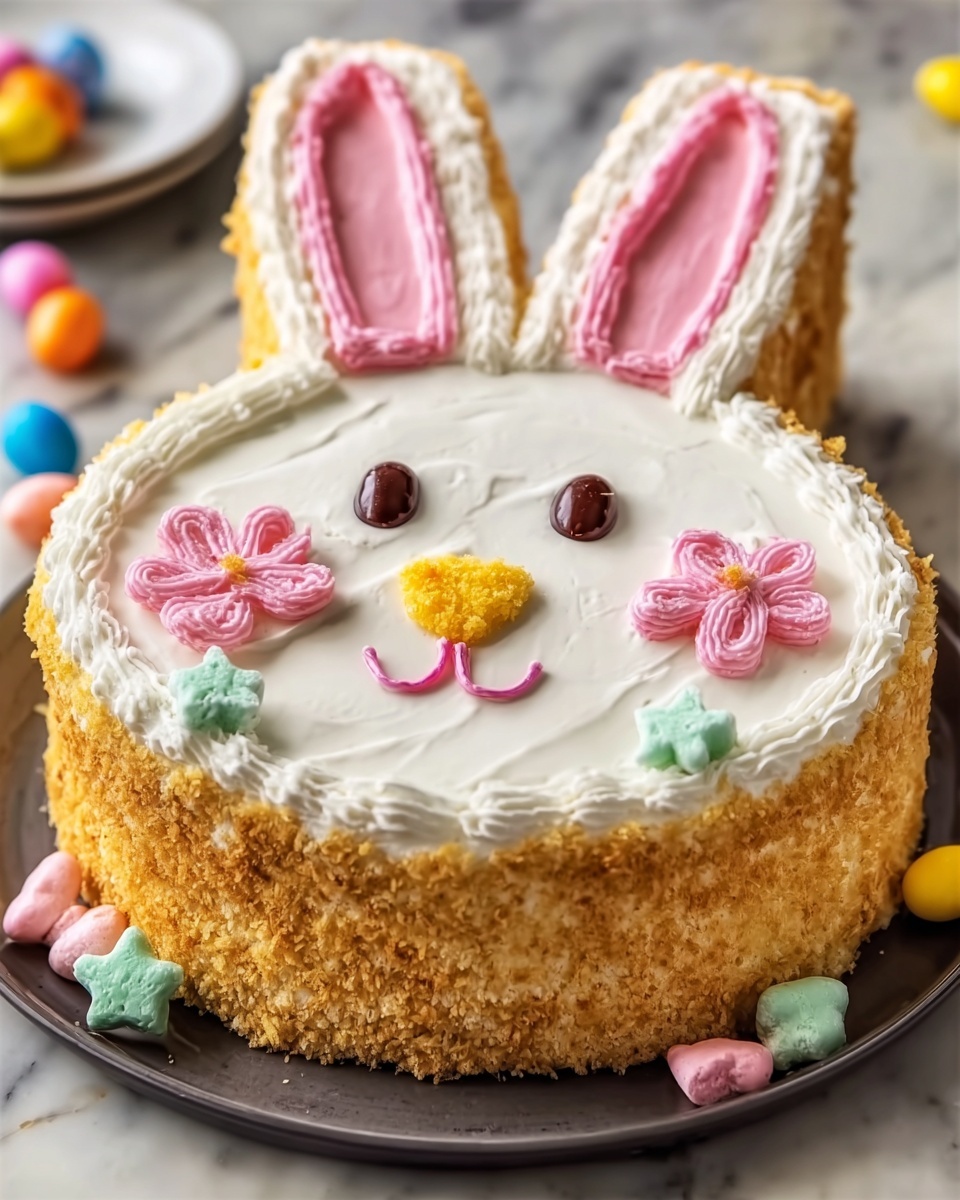
If you’re looking for a show-stopping centerpiece for your Easter celebration, look no further than this delightful Easter Bunny Cake Recipe. This charming cake combines a moist, buttery sponge with fluffy, sweet frosting that’s flecked with shredded coconut to mimic soft bunny fur. Adorned with colorful jelly beans and a cute pink nose, it’s a fun and festive treat that’s as joyful to make as it is to eat. Whether you’re baking with kids or just love a whimsical dessert, this Easter Bunny Cake Recipe will bring smiles and a touch of magic to your holiday table.

Ingredients You’ll Need
These ingredients are simple, classic, and create the perfect balance of texture and flavor for this Easter Bunny Cake Recipe. Each one plays a crucial role, from the tender crumb of the cake to the luscious frosting that holds your bunny together and adds that sweet final touch.
- 2 cups all-purpose flour: The base of the cake, providing structure and softness.
- 2 cups granulated sugar: Adds sweetness and helps with the cake’s tender crumb.
- 1 cup unsalted butter, softened (for cake): Adds rich flavor and moisture to the batter.
- 4 large eggs: Bind everything together and give the cake lift.
- 1 cup whole milk: Ensures a moist, tender crumb and balances flavors.
- 2 teaspoons baking powder: The leavening agent that makes the cake rise perfectly.
- 1/2 teaspoon salt: Enhances flavor and balances the sweetness.
- 2 teaspoons vanilla extract (for cake): Provides warm, comforting aroma and flavor.
- 1 cup unsalted butter, softened (for frosting): Creates a creamy, smooth frosting base.
- 4 cups powdered sugar: Sweetens and thickens the frosting to pipe and spread easily.
- 2 teaspoons vanilla extract (for frosting): Adds a rich vanilla flavor to the frosting.
- 2 tablespoons heavy cream: Makes frosting light and fluffy, adjusting texture as needed.
- Pink food coloring: For the bunny’s adorable nose detail.
- Green food coloring (optional): Perfect for decorating the cake board to resemble grass.
- Shredded coconut: Adds fluffy bunny texture to the frosting’s surface.
- Jelly beans or candy: Colorful decorations for the bunny’s eyes and nose, making it playful and festive.
How to Make Easter Bunny Cake Recipe
Step 1: Prepare the Cake Batter
Start by preheating your oven to 350°F (175°C) and greasing two 9-inch round cake pans. This sets the stage for a perfectly baked cake. Then, in a large bowl, cream together the softened butter and sugar until it’s light and fluffy—that’s the secret to a tender crumb. Next, add eggs one at a time, mixing thoroughly after each addition to build the cake’s structure.
Step 2: Mix Dry and Wet Ingredients
In a separate bowl, sift together the flour, baking powder, and salt. Then alternately add the dry ingredients and the milk into your creamed butter mixture, starting and ending with the dry ingredients. This ensures a smooth batter without overmixing, which can toughen the cake. Finish by stirring in the vanilla extract for a burst of fragrant warmth.
Step 3: Bake and Cool
Pour the batter evenly into the prepared pans and bake for 30 to 35 minutes, or until a toothpick comes out clean. This timing guarantees a moist but fully cooked cake. Once done, let the cakes cool in their pans for 10 minutes so they set gently, then transfer to wire racks to cool completely, which is important before frosting.
Step 4: Make the Frosting
While the cakes cool, whip your frosting. Beat the softened butter until smooth, then gradually add powdered sugar in increments, mixing well between additions. Add vanilla and heavy cream to make the frosting light and spreadable. Adjust the cream a bit if the consistency isn’t quite right—this is the magic behind a fluffy, pipe-able frosting perfect for decorating.
Step 5: Shape the Bunny
Carefully cut one of the cooled cakes in half for the bunny’s ears. Place the whole round cake on your serving board as the face, then arrange the two halves on top to form perfect bunny ears. Use a bit of frosting as ‘glue’ to secure the pieces, so your bunny stays intact and adorable.
Step 6: Decorate Your Easter Bunny Cake Recipe
Spread the white frosting generously all over the cake and ears for a soft, snowy fur look. While the frosting is still fresh, press shredded coconut onto the surface to add texture that mimics fluffy bunny fur — it’s like giving your cake a cozy fuzzy sweater. Tint a small amount of frosting with pink food coloring and pipe a tiny nose onto the bunny’s face, then add jelly beans or candy for eyes. You can make the expression even sweeter by piping on a smile and whiskers with extra frosting. To finish, color the cake board green if you’d like your bunny to sit in an Easter grass patch—this adds a whimsical touch that everyone will appreciate.
How to Serve Easter Bunny Cake Recipe
Garnishes
Garnishing isn’t just for looks—it enhances the festive Easter vibe! In addition to coconut fur and candy eyes, try edible flowers or pastel sprinkles around your bunny for a pop of color. These little accents bring your Easter Bunny Cake Recipe to life and amp up the joy.
Side Dishes
Pair this sweet treat with light, refreshing sides like fresh berries or a fruit salad to balance the richness of the cake. A dollop of whipped cream or a scoop of vanilla ice cream makes for an indulgent complement that everyone will enjoy alongside the festive centerpiece.
Creative Ways to Present
If you want to impress your guests even more, serve the bunny cake on a decorated platter with faux grass made from green-tinted coconut or colored sugar. Arrange pastel-colored jelly beans or mini chocolate eggs around the cake for extra Easter flair. Wrapping the table setup with fresh spring flowers completes a joyful, welcoming presentation that’s sure to wow your family and friends.
Make Ahead and Storage
Storing Leftovers
Once your Easter Bunny Cake Recipe has been enjoyed, store any leftovers in an airtight container in the refrigerator. Keeping it cool maintains the frosting’s texture and keeps the cake moist for up to 3-4 days. Let slices return to room temperature before serving to revive that freshly baked taste.
Freezing
This cake freezes beautifully if you want to prepare ahead of time. Wrap the cake tightly in plastic wrap and then in foil to prevent freezer burn. Frozen, it’ll keep for up to 2 months. Thaw overnight in the fridge and decorate afterward if you prefer fresh frosting and garnishes.
Reheating
Warm slices gently in the microwave for 10-15 seconds if you want a cozy, just-baked feel. Avoid overheating, as the frosting can melt and the texture may change. Serving slightly chilled or at room temperature works best for maintaining the bunny cake’s delightful consistency.
FAQs
Can I make this Easter Bunny Cake Recipe gluten-free?
Absolutely! Substitute the all-purpose flour with a gluten-free baking blend, making sure it contains xanthan gum for structure. The texture might be slightly different but still delicious and perfect for those with gluten sensitivities.
What’s the best way to decorate the bunny’s eyes if I don’t have jelly beans?
You can use mini chocolate chips, colored fondant, or even raisins. Just pick something small and round with a bit of contrast against the white frosting to create expressive, cute eyes.
Can this cake be made ahead for an Easter party?
Yes! You can bake the cake layers and even whip up the frosting a day or two in advance. Just assemble and decorate on the day of your event for the freshest look, or assemble earlier and keep refrigerated.
How do I avoid the cake drying out?
Be careful not to overbake; check the cake a few minutes before the baking time ends with a toothpick. Also, properly storing leftover cake in an airtight container will keep it moist and tender.
Is shredded coconut essential for the bunny fur effect?
While it adds charming texture and a realistic bunny-fur look, you could substitute with white chocolate shavings or leave it out if coconut isn’t your thing. The bunny will still be adorable and delicious!
Final Thoughts
This Easter Bunny Cake Recipe isn’t just a dessert, it’s a celebration you can share with loved ones, full of fun, flavor, and Easter spirit. Baking and decorating this cake fills the kitchen with warmth and laughter, creating memories as sweet as the cake itself. So grab your mixing bowls and colorful candies — your festive, fluffy bunny is waiting to hop right onto your table!
Print
Easter Bunny Cake Recipe
- Prep Time: 30 minutes
- Cook Time: 35 minutes
- Total Time: 1 hour 5 minutes
- Yield: 10-12 servings
- Category: Dessert
- Method: Baking
- Cuisine: American
Description
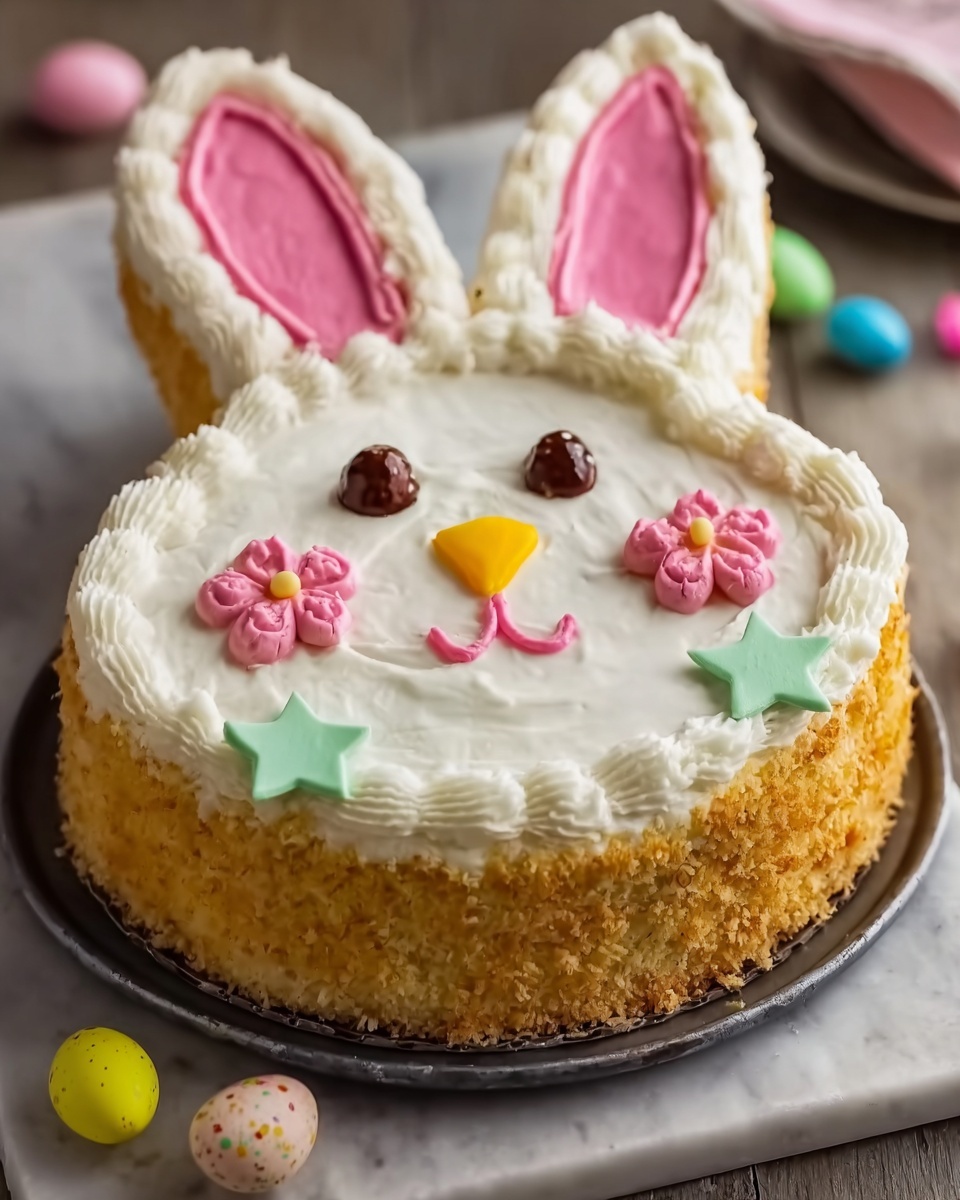
Celebrate Easter with this charming and delicious Easter Bunny Cake, perfect for family gatherings and festive occasions. This moist, vanilla-flavored cake is shaped like a bunny and decorated with fluffy frosting, shredded coconut for fur, and colorful candies for eyes and nose, creating a fun and festive centerpiece that’s sure to delight kids and adults alike.
Ingredients
Cake Ingredients
- 2 cups all-purpose flour
- 2 cups granulated sugar
- 1 cup unsalted butter, softened
- 4 large eggs
- 1 cup whole milk
- 2 teaspoons baking powder
- 1/2 teaspoon salt
- 2 teaspoons vanilla extract
Frosting Ingredients
- 1 cup unsalted butter, softened
- 4 cups powdered sugar
- 2 teaspoons vanilla extract
- 2 tablespoons heavy cream (more if needed for desired consistency)
- Pink food coloring (for the bunny’s nose)
- Green food coloring (optional, for decorating the cake board)
- Shredded coconut (for bunny’s fur)
- Jelly beans or candy for eyes and nose
Instructions
- Prepare the Cake: Preheat your oven to 350°F (175°C). Grease and flour two 9-inch round cake pans to prevent sticking.
- Cream Butter and Sugar: In a large mixing bowl, cream together the softened butter and granulated sugar until the mixture is light and fluffy, which helps incorporate air for a tender cake.
- Add Eggs: Add the eggs one at a time, beating well after each addition to ensure even distribution.
- Mix Dry Ingredients: In a separate bowl, whisk together the all-purpose flour, baking powder, and salt to combine the leavening and seasoning.
- Combine Wet and Dry Ingredients: Gradually add the dry ingredients alternately with the milk to the butter mixture, starting and ending with the dry ingredients, mixing just until combined to avoid overmixing.
- Add Vanilla Extract: Stir in the vanilla extract to impart flavor throughout the batter.
- Bake the Cake: Pour the batter evenly into the prepared cake pans and bake in the preheated oven for 30-35 minutes, or until a toothpick inserted into the center comes out clean.
- Cool the Cakes: Allow the cakes to cool in the pans for 10 minutes, then transfer to wire racks to cool completely before decorating.
- Make Frosting: In a large bowl, beat the softened butter until smooth. Gradually add powdered sugar, about 1 cup at a time, beating well after each addition.
- Add Vanilla and Cream: Mix in the vanilla extract and heavy cream, continue beating until the frosting is light and fluffy; adjust consistency by adding more cream if needed.
- Shape the Bunny: Once cooled, cut one cake layer in half to form the bunny ears. Place the whole cake layer on a platter as the face, then position the two halves at the top to create ears, using frosting to secure them if necessary.
- Frost the Cake: Apply a generous layer of white frosting over the entire cake including the ears to simulate bunny fur.
- Add Texture: Press shredded coconut onto the frosting all over the cake to create a fluffy fur texture.
- Decorate the Face: Tint a small amount of frosting with pink food coloring and pipe a small nose on the bunny’s face. Use jelly beans or candies to make the eyes, and add a smile and whiskers with additional frosting.
- Decorate Cake Board: Optionally, tint the cake board with green food coloring to resemble grass for an extra festive touch.
- Serve: Your Easter Bunny Cake is now ready to be enjoyed as a delightful centerpiece and delicious dessert for your celebration.
Notes
- Ensure the butter is softened to room temperature to make creaming easier and smoother frosting.
- Do not overmix the batter once the dry ingredients are added to avoid a dense cake.
- Use shredded coconut for an authentic bunny fur look, but you can substitute with finely grated white chocolate if preferred.
- Adjust the consistency of the frosting by adding more heavy cream gradually if it’s too thick to pipe.
- Use a serrated knife for clean cuts when shaping cake layers for better presentation.
- Store any leftover cake covered at room temperature for up to 2 days or refrigerate up to 4 days.


