
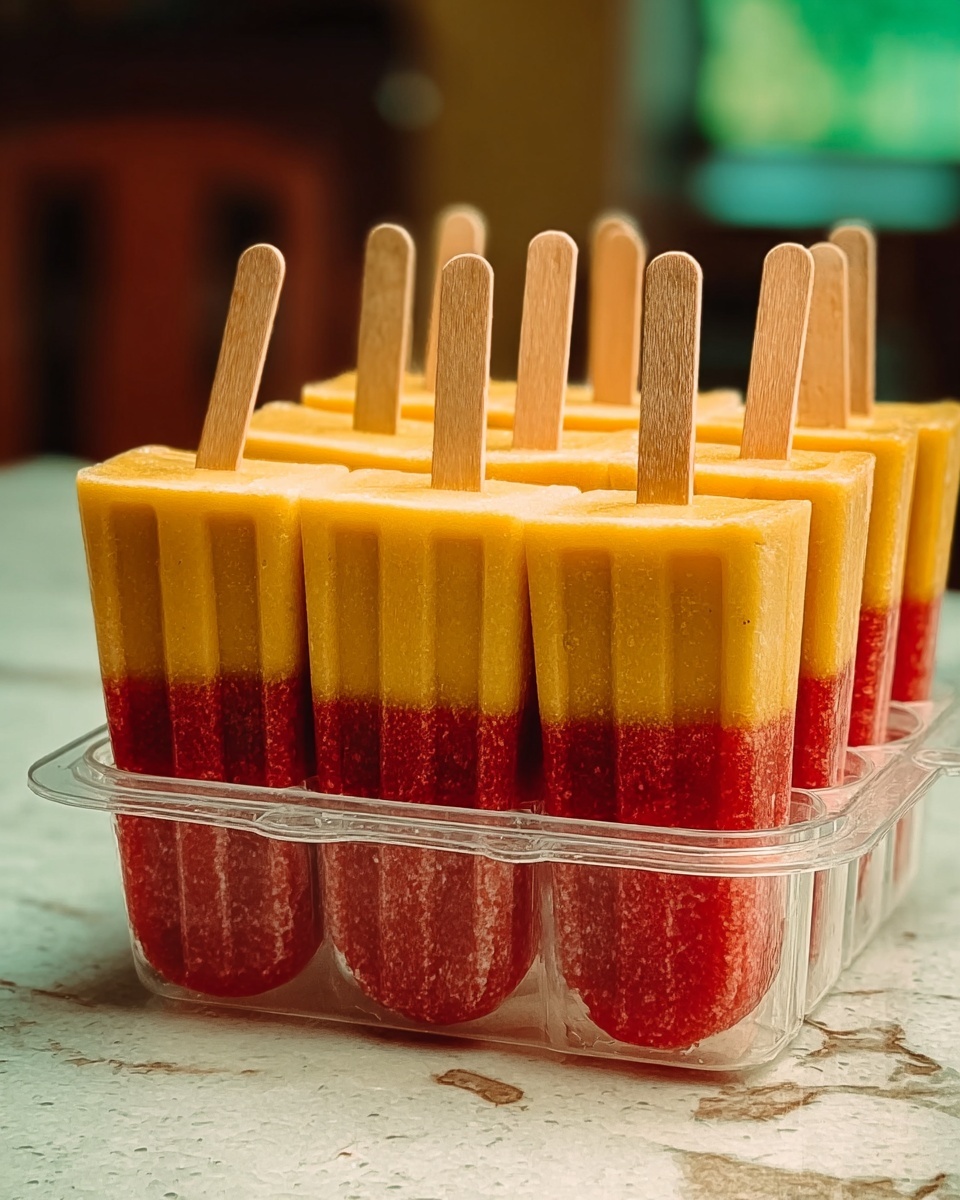
If you are searching for a vibrant, delicious, and guilt-free way to cool down on a sunny day, this Fruit Popsicles: A Refreshing and Healthy Treat for All Ages Recipe is exactly what you need. Bursting with natural sweetness from fresh fruits and a hint of honey or agave nectar, these popsicles are not only an absolute delight for your taste buds but also a nourishing snack that’s perfect for everyone—from tiny tots to grown-ups. They offer a simple yet exciting way to enjoy seasonal fruits, turning them into icy treats that brighten up your day while keeping things wholesome and fun.
Ingredients You’ll Need
Creating these stunning fruit popsicles requires just a handful of fresh, easy-to-find ingredients that each bring a unique layer of flavor, texture, and vibrancy to your final treat. Every element works harmoniously to make your popsicles taste fresh, naturally sweet, and perfectly refreshing.
- 2 cups mixed fresh fruit: Choose vibrant berries, kiwi, and mango for a colorful and tropical blend full of juicy flavor and vitamins.
- 1/4 cup honey or agave nectar: Adds a gentle sweetness while keeping your popsicles healthy and free from refined sugars.
- 1/4 cup water: Balances the blend and ensures the perfect icy consistency once frozen.
- Popsicle molds: Essential for shaping your icy treats into fun, handheld delights.
- Popsicle sticks: Make sure you have sturdy sticks on hand to hold your popsicles comfortably as you enjoy them.
How to Make Fruit Popsicles: A Refreshing and Healthy Treat for All Ages Recipe
Step 1: Prep Your Fruit
Start by washing your fruit thoroughly and chopping it into small, manageable pieces. This ensures that when you blend, you get a smooth, even texture full of little bursts of fresh flavor from each fruit.
Step 2: Blend the Magic
Pop your chopped fruit into the blender along with the honey or agave nectar and water. Blend everything until smooth, making sure to taste and adjust the sweetness if you want it just a bit sweeter or more tangy depending on your fruit selection.
Step 3: Fill the Molds
Carefully pour the luscious fruit puree into your popsicle molds. Insert the sticks securely so they stand upright while freezing. This step is what transforms your fresh blend into those perfectly shaped icy treats that everyone loves.
Step 4: Freeze to Perfection
Pop the molds into the freezer for at least 4 hours to let your popsicles set fully. This patience pays off with refreshingly solid popsicles that hold their shape beautifully.
Step 5: Enjoy the Chill
When ready, run the molds briefly under warm water to loosen the popsicles. Pull them out gently, and get ready to indulge in a frozen treat that is bursting with natural fruit flavors and cool sweetness. Pure refreshment awaits!
How to Serve Fruit Popsicles: A Refreshing and Healthy Treat for All Ages Recipe
Garnishes
If you want to jazz up your popsicles presentation, consider adding a sprinkle of shredded coconut, a dusting of chia seeds, or even a little fresh mint on top right before serving. These accents add texture and a little extra wow factor while boosting the health benefits.
Side Dishes
Pair your fruit popsicles with light snacks like a crisp green salad, some roasted nuts, or a small bowl of yogurt. These sides complement the popsicles by offering contrast in texture and additional nutrients for a balanced summer snack or light dessert.
Creative Ways to Present
Think outside the mold: serve your popsicles alongside a colorful tray of whole fresh fruits, or stand them upright in a clear vase filled with ice cubes and a few slices of lemon or lime for a festive look. Kids especially love popsicles served this way at parties or family gatherings.
Make Ahead and Storage
Storing Leftovers
One of the great things about this Fruit Popsicles: A Refreshing and Healthy Treat for All Ages Recipe is how well the popsicles keep in the freezer. Store any leftovers in an airtight container or tightly sealed plastic bag to prevent freezer burn and flavor loss.
Freezing
Ensure your popsicles are completely frozen before handling or stacking them together so they don’t stick to each other. Well-frozen fruit popsicles can last up to 3 months without sacrificing taste or texture.
Reheating
These popsicles are meant to be enjoyed frozen, so reheating is not necessary. To soften them for easier eating, simply leave them out at room temperature for a few minutes or briefly run under warm water.
FAQs
Can I use frozen fruit instead of fresh fruit?
Absolutely! Frozen fruits work well and can give your popsicles an even creamier texture. Just thaw them slightly before blending to make the process easier.
Is there a way to make these popsicles sugar-free?
You can skip the honey or agave nectar if your fruit is naturally sweet enough. Alternatively, a splash of natural fruit juice can add extra sweetness without added sugar.
What else can I add for extra nutrition?
Adding ingredients like spinach, kale, or chia seeds to the blend boosts nutrition without changing the flavor too much, making the popsicles even healthier.
Can I make these popsicles without a blender?
While a blender makes it easier to achieve a smooth consistency, you can mash the fruits by hand for a chunkier texture if desired.
How long do homemade popsicles last in the freezer?
If stored well in an airtight container, they remain delicious for up to 3 months, but it’s best to enjoy them within the first few weeks for peak freshness.
Final Thoughts
This Fruit Popsicles: A Refreshing and Healthy Treat for All Ages Recipe is a total winner anytime you want to enjoy a cool, nourishing snack. It’s so easy to make, endlessly customizable, and simply bursting with natural fruit goodness that brings a smile to everyone’s face. So grab your favorite fruits, let your creativity flow, and treat yourself and your loved ones to these delicious, vibrant popsicles today!
Print
Fruit Popsicles: A Refreshing and Healthy Treat for All Ages Recipe
- Prep Time: 10 minutes
- Cook Time: 0 minutes
- Total Time: 4 hours 10 minutes
- Yield: 6 popsicles
- Category: Dessert
- Method: Freezing
- Cuisine: American
- Diet: Vegetarian
Description
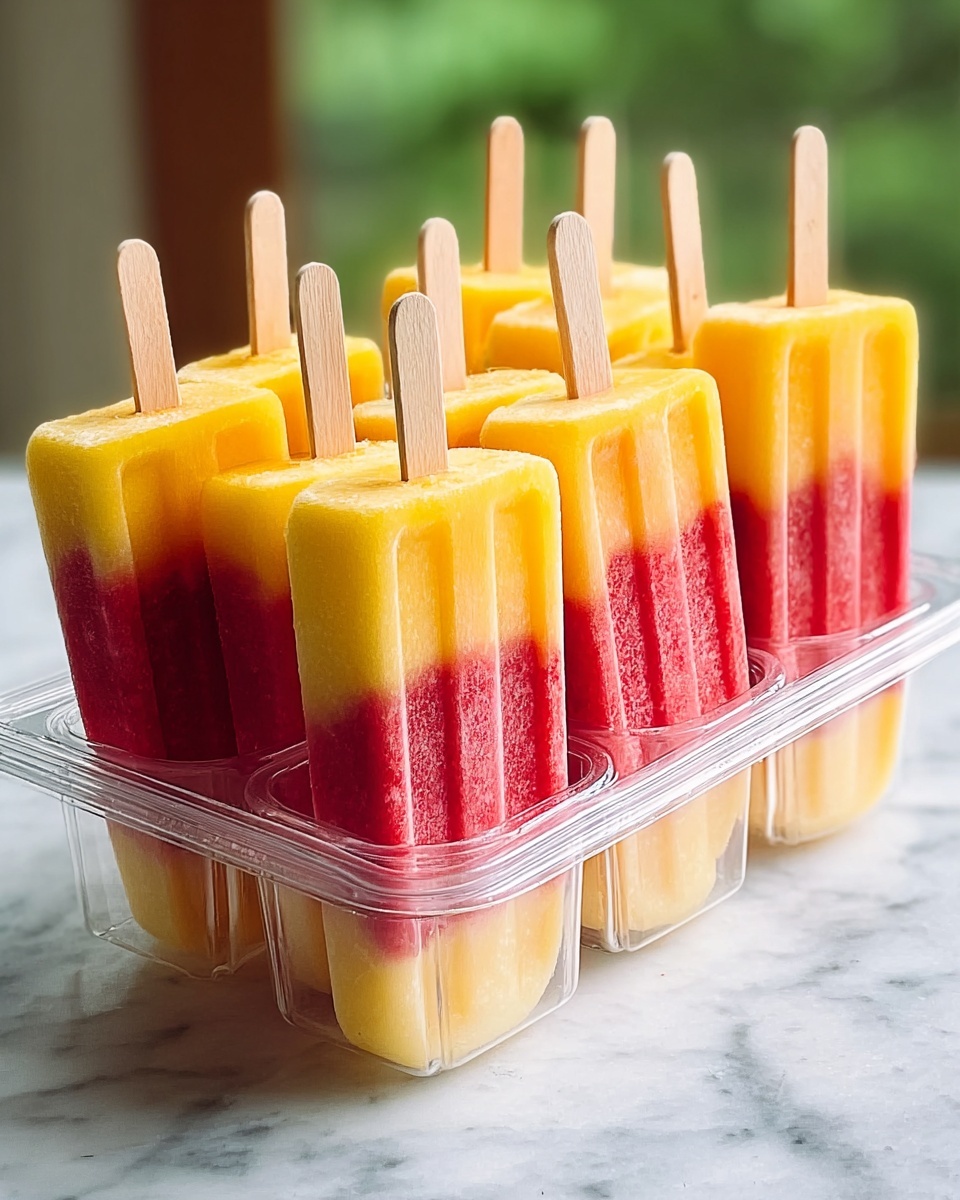
These Fruit Popsicles are a refreshing and healthy treat perfect for all ages. Made with a blend of fresh mixed fruits sweetened naturally with honey or agave nectar, they offer a delicious and nutritious way to cool down on warm days. Easy to make and customizable with your favorite fruits, these popsicles are ideal for a guilt-free snack or dessert.
Ingredients
Fruits
- 2 cups mixed fresh fruit (such as berries, kiwi, and mango)
Sweetener and Liquid
- 1/4 cup honey or agave nectar
- 1/4 cup water
Equipment
- Popsicle molds
- Popsicle sticks
Instructions
- Prepare the Fruit: Wash and chop the mixed fresh fruit into small pieces to ensure they blend smoothly.
- Blend Ingredients: Add the chopped fruit, honey or agave nectar, and water into a blender. Blend the mixture until it becomes smooth and consistent.
- Fill Molds and Freeze: Pour the blended fruit mixture into popsicle molds, insert the popsicle sticks, and place them in the freezer. Freeze for at least 4 hours or until completely solid.
- Release Popsicles: Once frozen, briefly run the popsicle molds under warm water to loosen the popsicles for easy removal.
- Serve and Enjoy: Remove the popsicles from the molds and enjoy your healthy, refreshing treat!
Notes
- You can use any combination of fresh fruits you prefer or have on hand.
- Adjust the sweetness by varying the amount of honey or agave nectar to taste.
- If you prefer a chunkier texture, partially blend the fruit instead of fully pureeing.
- For a vegan alternative, use agave nectar instead of honey.
- Store any leftover popsicles in an airtight container in the freezer for up to 1 week.

