
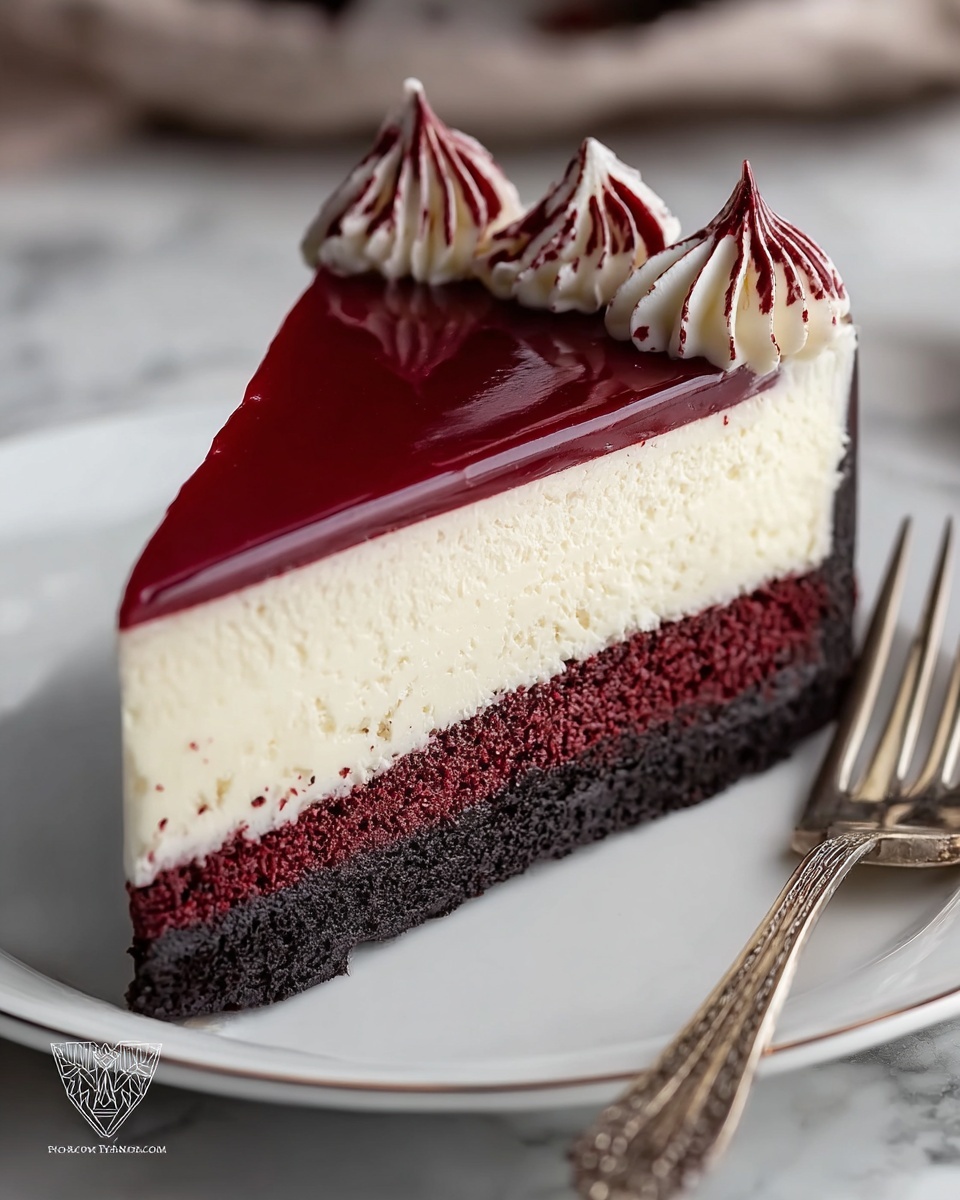
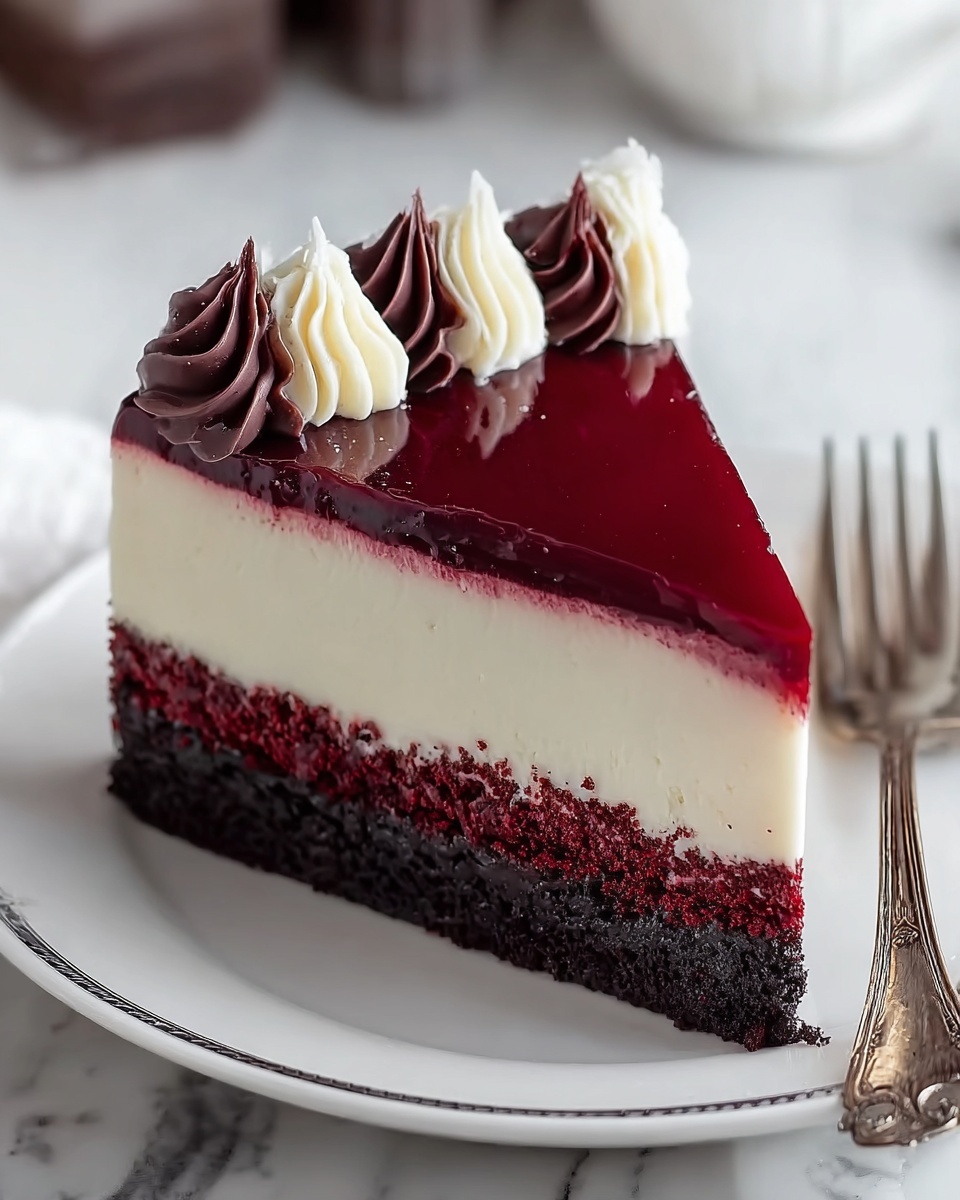
If you’ve ever dreamed of combining the rich, creamy decadence of cheesecake with the vibrant charm of red velvet cake, then this Homemade Red Velvet Cheesecake Recipe is your new best friend in the kitchen. It’s a show-stopping dessert that’s bound to captivate anyone lucky enough to have a slice. Imagine a luscious, velvety cream cheese filling kissed by cocoa and a perfect shade of red, resting on a crisp Oreo crust, finished with a smooth, fluffy cream cheese frosting. Whether you’re celebrating a special occasion or just indulging a sweet craving, this recipe delivers comfort and elegance in every bite.
Ingredients You’ll Need
Gathering simple yet carefully chosen ingredients is key to nailing the perfect balance of flavors and textures in this cheesecake. Each item contributes to the classic red velvet’s signature color, creamy richness, or crumbly crust that holds it all together beautifully.
- Crushed Oreo cookies (2 ½ cups or 250 g): These create a chocolatey, crunchy crust with a hint of sweetness, providing a delightful contrast to the smooth cheesecake.
- Unsalted butter (5 tablespoons melted + ¼ cup softened): Essential for binding the crust and adding creamy richness to the frosting.
- Cream cheese (32 ounces softened + 4 ounces softened): The star ingredient lending that signature tang and velvety texture both in the cheesecake and frosting.
- Granulated sugar (1 ⅓ cups): Sweetens the cheesecake filling to perfection while letting other flavors shine through.
- Cocoa powder (½ cup): Adds a subtle chocolate depth that elevates the red velvet profile without overpowering it.
- Sour cream (1 cup, room temperature): Boosts creaminess and helps keep the filling moist and tender.
- White vinegar (1 tablespoon): Reacts with the baking soda in the cocoa powder for that classic red velvet tang and color enhancement.
- Vanilla extract (1 tablespoon + 1 teaspoon): Brings warmth and complexity to both the cheesecake and the frosting.
- Red food coloring (1–2 ounces): This is what gives your cheesecake that stunning red hue that makes red velvet irresistible.
- Large eggs (4, lightly beaten): Provide structure and help the cheesecake set perfectly.
- Confectioners’ sugar (¼ cup): Sweetens the frosting with a silky finish perfect for spreading.
How to Make Homemade Red Velvet Cheesecake Recipe
Step 1: Prepare the Crust
Start by preheating your oven to 350°F (175°C), and make sure to protect your springform pan by wrapping the bottom with two layers of heavy-duty aluminum foil. This creates a waterproof barrier for the upcoming water bath. Then, combine the crushed Oreo cookies with melted butter until all crumbs are moistened. Press this mixture firmly into the bottom and up the sides of the pan, creating an even, compact crust. Pop it in the oven for about 10 minutes to set, then let it cool. This crust will lend a luscious chocolatey crunch for every bite of your cheesecake.
Step 2: Make the Cheesecake Filling
Now, lower your oven temperature to 300°F (150°C) because a slow bake is crucial for a creamy center. Beat the softened cream cheese until completely smooth, ensuring no lumps remain. Gradually add granulated sugar and cocoa powder, mixing well to blend the rich chocolate flavor evenly. Fold in the sour cream, white vinegar, vanilla extract, and your red food coloring—adjusting the amount until you achieve that perfect crimson tone that defines a red velvet cake. Finally, gently incorporate the eggs one at a time, folding just until combined to keep the texture silky. Pour this vibrant batter over your cooled cookie crust, ready to become the star of your dessert table.
Step 3: Bake with a Water Bath
Place the springform pan inside a large roasting pan and carefully pour boiling water into the outer pan until it reaches halfway up the sides of your cheesecake pan. This water bath method prevents cracking by providing gentle, even heat and adds moisture to the oven. Bake your cheesecake for 1 hour. Once the time is up, turn off the oven but leave the cheesecake inside the water bath and oven for an additional hour. This slow cooling period is what helps achieve a perfectly smooth and creamy texture without cracks, resulting in that flawless finish.
Step 4: Chill and Frost
After the water bath, remove your cheesecake and let it cool completely on a wire rack. Once cooled, refrigerate the cheesecake for at least 4 hours—overnight is even better, as it allows the flavors to meld and the texture to firm up splendidly. While waiting, prepare the frosting by beating softened cream cheese with softened butter until creamy and light. Mix in the confectioners’ sugar and a teaspoon of vanilla extract until fluffy and smooth. When your cheesecake is chilled and ready, spread this luscious frosting on top in an even layer or swirl it decoratively for a stunning presentation.
How to Serve Homemade Red Velvet Cheesecake Recipe
Garnishes
When it comes to garnishing this magnificent dessert, simplicity shines through beautifully. Fresh berries like raspberries or strawberries add a bright, tangy note that pairs exquisitely with the creamy richness. A light dusting of cocoa powder or chocolate shavings brings a hint of elegance without overpowering the delicate red velvet flavor. If you’re feeling whimsical, edible rose petals can add a romantic touch, perfect for special occasions.
Side Dishes
This cheesecake stands strong as the centerpiece, but pairing it with a few light sides can enhance the experience. A scoop of vanilla or cinnamon ice cream complements the cake’s creaminess, while a hot cup of coffee, espresso, or rich hot chocolate creates a comforting, cozy duo. For something fresh, a small mixed green salad with a tangy vinaigrette balances the richness on the palate.
Creative Ways to Present
Presentation elevates any dish! Try serving individual slices on elegant plates with a drizzle of raspberry coulis or chocolate sauce. You can also transform slices into mini cheesecake parfaits layered in clear glasses with crushed Oreos and whipped cream for a playful twist. For gatherings, decorate the top with piped rosettes of frosting or themed colored sprinkles to match holidays or celebrations—turning your Homemade Red Velvet Cheesecake Recipe into a feast for both the eyes and taste buds.
Make Ahead and Storage
Storing Leftovers
Your homemade cheesecake will keep beautifully in the fridge for up to 5 days if stored properly in an airtight container or tightly wrapped with plastic wrap. This ensures it stays moist without absorbing other fridge odors. Before serving leftovers, allow the cheesecake to sit at room temperature for about 15 to 20 minutes to soften up for an ideal texture.
Freezing
If you want to make your red velvet cheesecake in advance or save some for later indulgence, freezing is a fantastic option. Wrap the whole cake or individual slices tightly in plastic wrap, then cover with aluminum foil and place in a freezer-safe container or bag. It will maintain excellent flavor and texture for up to 2 months. When ready to enjoy, thaw the cheesecake in the fridge overnight for best results.
Reheating
While cheesecake is generally enjoyed chilled, if you prefer a slightly warmer slice, bring it to room temperature and then warm gently in the microwave in 10-second intervals. Be careful not to overheat, as this can change the texture and cause the frosting to melt. Warmed cheesecake tastes especially delightful when paired with a dollop of whipped cream or a spoonful of fresh fruit.
FAQs
Can I use a different crust instead of Oreo cookies?
Absolutely! While the Oreo crust adds a lovely chocolate crunch, you can substitute with graham crackers, digestive biscuits, or even crushed pecans for a nutty twist. Just be sure to mix the crumbs with melted butter to hold the crust together firmly.
Is it necessary to use a water bath for baking this cheesecake?
Yes, the water bath is highly recommended as it gently cooks the cheesecake, preventing cracks and creating a smooth, creamy texture. If you skip this step, your cheesecake might bake unevenly and develop an unappealing crust or cracks on top.
Can I make this cheesecake without red food coloring?
If you prefer to skip artificial coloring, you can try natural alternatives like beet juice or powder, which provide color and a mild earthy sweetness. Keep in mind that the classic vibrant red hue may be less intense with natural colorings.
How long does it take to chill the cheesecake properly?
Chilling for at least 4 hours is essential to let the cheesecake set and develop its full flavor, but overnight refrigeration is ideal. This rest time helps the texture firm up nicely and makes slicing cleaner and easier.
Can I prepare the frosting a day in advance?
Definitely! Making the cream cheese frosting a day ahead can actually enhance its flavor. Just store it in an airtight container in the fridge and give it a quick stir before spreading it on your chilled cheesecake.
Final Thoughts
This Homemade Red Velvet Cheesecake Recipe is truly a labor of love that pays off with every forkful. It’s a stunning dessert perfect for impressing friends or treating yourself to something incredibly special. Once you dive in, you’ll find it’s well worth the time and effort, becoming a treasured recipe to make time and time again. So go ahead, gather your ingredients, preheat that oven, and prepare to enjoy one of the most delicious celebrations of red velvet and cheesecake you’ve ever tasted!
Print
Homemade Red Velvet Cheesecake Recipe
- Prep Time: 45 minutes
- Cook Time: 1 hour 10 minutes
- Total Time: 6 hours 55 minutes
- Yield: 12 servings
- Category: Dessert
- Method: Baking
- Cuisine: American
- Diet: Vegetarian
Description
This Homemade Red Velvet Cheesecake combines the rich, velvety flavors of classic red velvet cake with the creamy indulgence of cheesecake. Featuring a crunchy Oreo cookie crust and a luscious, smooth filling enhanced by cocoa and red food coloring, this dessert is sure to impress. Topped with a silky cream cheese frosting, it’s perfect for celebrations or a decadent treat.
Ingredients
Crust
- 2 ½ cups (250 g) crushed Oreo cookies (about 30 cookies)
- 5 tablespoons unsalted butter, melted
Cheesecake Filling
- 32 ounces (908 g) cream cheese, softened
- 1 ⅓ cups (267 g) granulated sugar
- ½ cup (42 g) cocoa powder
- 1 cup (227 g) sour cream, room temperature
- 1 tablespoon white vinegar
- 1 tablespoon vanilla extract
- 1–2 ounces red food coloring
- 4 large eggs, room temperature, lightly beaten
Frosting
- 4 ounces (113 g) cream cheese, softened
- ¼ cup (56 g) unsalted butter, softened
- 2 cups (260 g) confectioners’ sugar
- 1 teaspoon vanilla extract
Instructions
- Prepare the Oven and Pan: Preheat your oven to 350°F (175°C). Wrap the bottom of a 9-inch springform pan with two layers of heavy-duty aluminum foil to prevent water leakage during the water bath baking.
- Make the Crust: Combine the crushed Oreo cookies with the melted butter until thoroughly mixed. Press this mixture evenly into the bottom and up the sides of the prepared springform pan. Bake the crust for 10 minutes, then remove from the oven and allow it to cool.
- Mix the Cheesecake Filling: Lower the oven temperature to 300°F (150°C). Beat the softened cream cheese until smooth and creamy. Gradually add in the granulated sugar and cocoa powder, mixing well. Stir in the sour cream, white vinegar, vanilla extract, and red food coloring, blending until fully incorporated. Finally, gently fold in the lightly beaten eggs until just combined, avoiding overmixing.
- Assemble and Bake the Cheesecake: Pour the cheesecake batter over the cooled Oreo crust, spreading evenly. Place the springform pan inside a larger roasting pan and pour boiling water halfway up the sides of the cheesecake pan to create a water bath, which helps bake the cheesecake evenly and prevents cracking. Bake for 1 hour, then turn off the oven and let the cheesecake remain in the water bath for an additional hour to finish setting.
- Cool and Chill: Remove the cheesecake from the oven and water bath, then cool it on a wire rack. Once cooled, refrigerate the cheesecake for at least 4 hours or preferably overnight to allow it to set fully and develop flavor.
- Prepare the Frosting: Beat together the softened cream cheese and butter until creamy and smooth. Gradually add the confectioners’ sugar and vanilla extract, mixing until the frosting is light and fluffy.
- Frost and Serve: Remove the chilled cheesecake from the springform pan and spread the prepared cream cheese frosting evenly over the top. Slice and serve chilled for the best taste and texture.
Notes
- Ensure all dairy ingredients like cream cheese and eggs are at room temperature for a smooth, lump-free batter.
- The water bath helps prevent cracking and ensures even baking of the cheesecake.
- Wrap the springform pan well with foil to avoid water seeping in during baking.
- You can adjust the amount of red food coloring to achieve your preferred shade of red velvet color.
- For best flavor and texture, chill the cheesecake overnight before frosting and serving.
- Use a hot knife when slicing the chilled cheesecake for clean slices.


