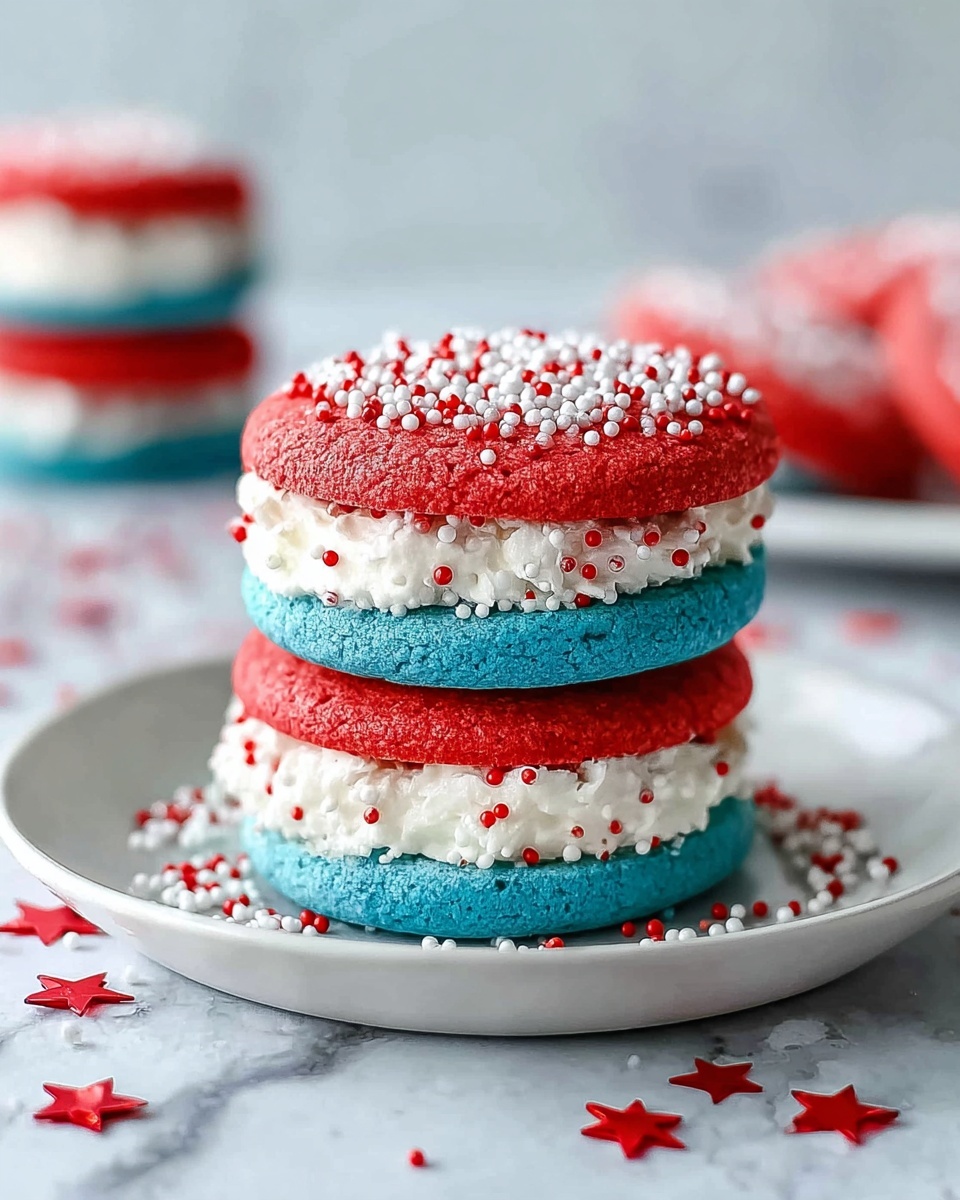
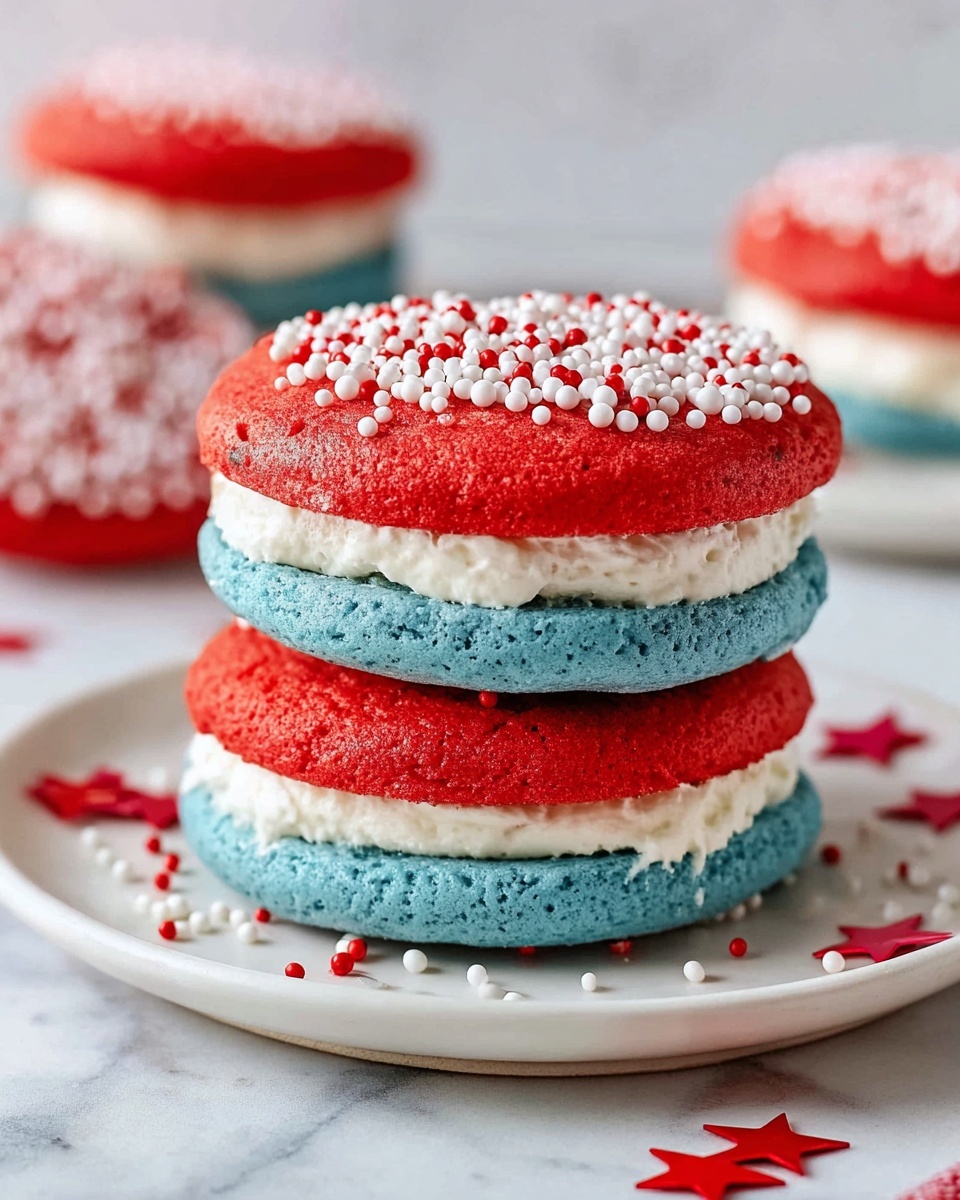
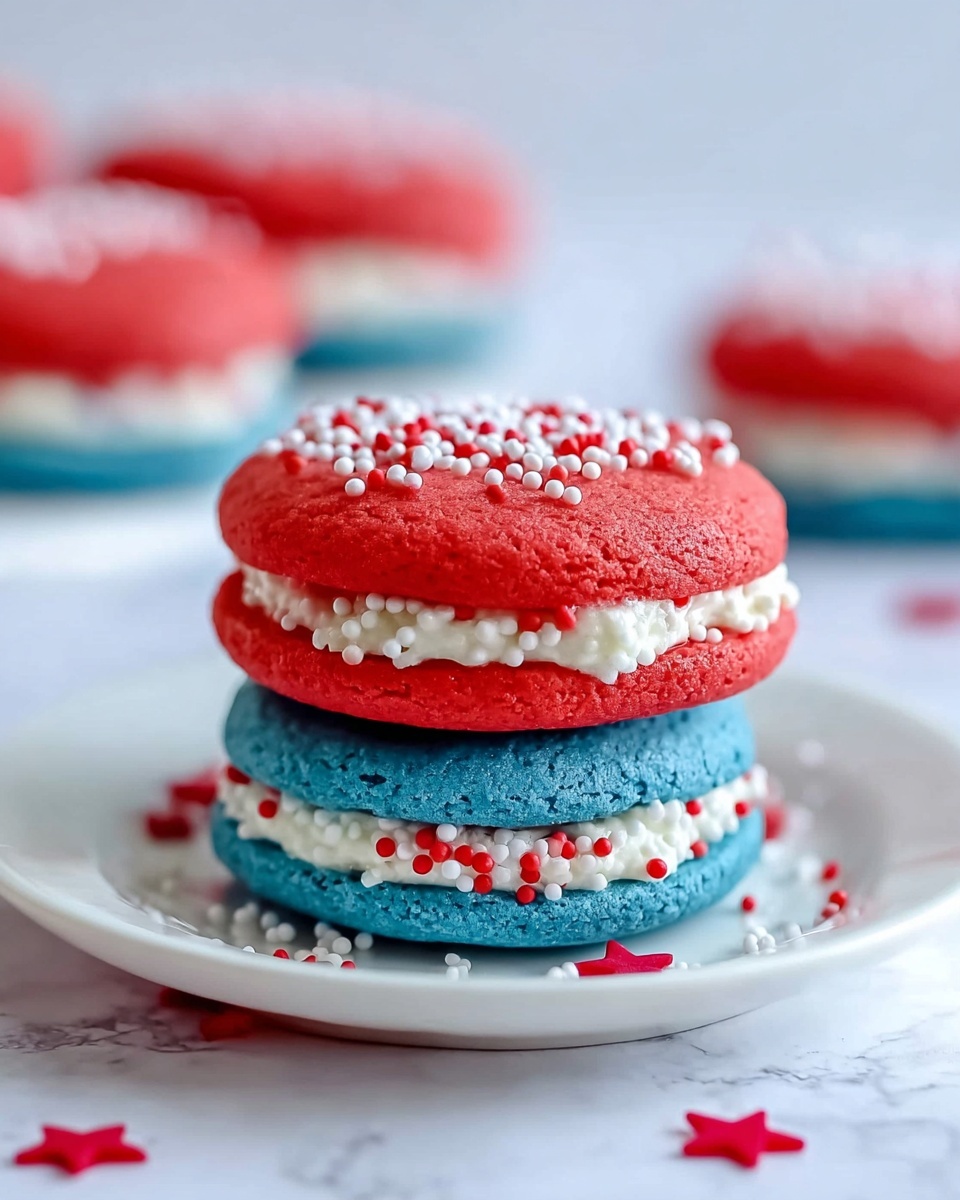
If you’re looking for a festive and utterly delightful treat that bursts with patriotic colors and irresistible flavors, this Red, White, and Blue Whoopie Pies Recipe is your new best friend in the kitchen. Combining fluffy, colorful cake rounds with a luscious cream cheese filling, these whoopie pies are perfect for celebrations, family gatherings, or simply indulging your sweet tooth. The vibrant reds and blues contrast beautifully with the creamy white filling, making every bite as joyful to look at as it is to eat.
Ingredients You’ll Need
These ingredients are simple staples with a few special touches that bring the Red, White, and Blue Whoopie Pies Recipe to life. Each component plays a key role in achieving the perfect texture, flavor, and patriotic flair.
- 1 box white cake mix: Provides a tender and fluffy base that’s incredibly easy to work with.
- 1 small (3.4 oz) box instant vanilla pudding mix: Adds moisture and extra richness to the cake rounds.
- 8 tablespoons (1/2 cup) unsalted butter, softened: Ensures softness and depth of flavor without overpowering the cake.
- 2 large eggs, room temperature: Help bind everything beautifully while giving the right structure.
- Red food coloring: Creates those vibrant red rounds essential for this patriotic treat.
- Blue food coloring: Contrasts perfectly with red for an eye-popping effect.
- Red, white, and blue sprinkles: Adds a fun, festive touch to the finished edges.
- 8 ounces cream cheese, softened: Makes the filling creamy and tangy, balancing sweetness.
- 3 cups powdered sugar: Sweetens the filling to perfection while maintaining smooth texture.
- 4 teaspoons vanilla extract: Delivers warmth and rounds out the flavor profile beautifully.
How to Make Red, White, and Blue Whoopie Pies Recipe
Step 1: Prepare Your Oven and Baking Sheets
Start by positioning your oven rack in the center and preheating it to 350°F (175°C). Line two baking sheets with parchment paper to keep your whoopie pies from sticking and help them bake evenly, which is essential for achieving that perfect golden exterior.
Step 2: Mix the Cake Batter
In a stand mixer fitted with the paddle attachment, blend together the white cake mix and the instant vanilla pudding mix. Add the softened butter and eggs, then beat on medium speed until fully combined. The dough will be thick and luscious—this ensures moist, fluffy whoopie pie rounds.
Step 3: Divide and Color the Dough
Split the batter evenly into two bowls. Add red food coloring to one and blue food coloring to the other, mixing each thoroughly so the color is even with no streaks. This step is where your whoopie pies start to truly come to life, with those iconic patriotic hues.
Step 4: Scoop and Arrange the Dough Rounds
Using a tablespoon or a small cookie scoop, drop rounds of the red and blue dough onto the prepared baking sheets. Leave about 2 inches between each to give them enough room to spread without merging together.
Step 5: Bake the Whoopie Pies
Bake one sheet at a time for approximately 10 minutes, or until the tops spring back when pressed gently. Don’t rush this step—perfectly baked cookies are soft but hold their shape. Let them cool on the baking sheet for 3 minutes before transferring to a wire rack to cool completely.
Step 6: Prepare the Cream Cheese Filling
While the cookies cool, whip together the cream cheese and powdered sugar in a clean mixer bowl with the paddle attachment. Beat on medium-high speed for 3-5 minutes until the mixture is light and fluffy. Stir in vanilla extract for that irresistible aromatic finish.
Step 7: Assemble the Whoopie Pies
Once cooled, spread a generous layer of the cream cheese filling on the flat side of one colored cookie. Top it with a cookie from the other color, flat side down, to create a sandwich. This colorful assembly is where your creation really shines.
Step 8: Add the Finishing Touches
Roll or sprinkle the edges of your whoopie pies with red, white, and blue sprinkles for a fun, festive presentation that dazzles both little and big eyes alike. Repeat for all remaining whoopie pies.
Step 9: Chill and Serve
Place the assembled whoopie pies in an airtight container and refrigerate until serving. Allow them to come to room temperature first for the best texture and flavor experience—this recipe is all about that perfect balance of creamy and cakey.
How to Serve Red, White, and Blue Whoopie Pies Recipe
Garnishes
For extra flair, garnishes like a dusting of powdered sugar or a few extra sprinkles add festive fun and make each pie look even more inviting. You can also add fresh berries on the side to complement the red, white, and blue theme naturally.
Side Dishes
These whoopie pies pair wonderfully with classic refreshments like cold milk, creamy vanilla ice cream, or a tall glass of iced tea. They’re sweet enough to stand alone but also versatile enough to complement many desserts or summer picnic snacks.
Creative Ways to Present
Serve these whoopie pies on a decorative platter layered with patriotic cloth napkins or amidst a spread of other red, white, and blue treats. For a whimsical touch, stack them into a whoopie pie tower or package a few in clear cellophane bags tied with festive ribbons as charming party favors.
Make Ahead and Storage
Storing Leftovers
You can store any leftover Red, White, and Blue Whoopie Pies Recipe creations in an airtight container in the refrigerator for up to 4 days. Keeping them cool keeps the cream cheese filling fresh and delicious.
Freezing
If you want to make these ahead of time, these whoopie pies freeze beautifully. Wrap them individually in plastic wrap and place them in a freezer-safe container or bag for up to 2 months. Thaw overnight in the fridge before serving.
Reheating
Since these are best enjoyed at room temperature, simply remove from the refrigerator or freezer and let sit on the counter for about 20 minutes. Avoid microwaving as it can change the texture of the cake and filling.
FAQs
Can I make whoopie pies without a cake mix?
Absolutely! You can bake whoopie pies from scratch, but using a white cake mix and pudding mix in this recipe makes it super simple while guaranteeing moist, fluffy results every time.
What can I substitute for cream cheese in the filling?
If you prefer not to use cream cheese, try using mascarpone or a combination of softened butter and powdered sugar for a sweeter, less tangy filling.
How do I prevent the cookies from spreading too much?
Make sure to chill the dough briefly if it’s too soft, and space drops of dough well on the baking sheet. Using parchment paper also helps control spreading.
Can I make these whoopie pies gluten-free?
Yes! Use a gluten-free white cake mix and ensure your pudding mix is gluten-free as well. The rest of the ingredients are naturally gluten-free.
How long do whoopie pies last at room temperature?
Because of the cream cheese filling, it’s best to store these whoopie pies refrigerated. At room temperature, they can only safely stay out for about 2 hours.
Final Thoughts
There’s something truly joyful about making and sharing this Red, White, and Blue Whoopie Pies Recipe. It brings together simple ingredients with a touch of creative flair that makes any occasion feel special and festive. Whether you’re gearing up for a holiday or just want a charming treat, these whoopie pies are bound to become a beloved favorite. Go ahead and give this recipe a try—you’ll love the smiles it brings at your table!
Print
Red, White, and Blue Whoopie Pies Recipe
- Prep Time: 15 minutes
- Cook Time: 20 minutes
- Total Time: 35 minutes
- Yield: 12 whoopie pies
- Category: Dessert
- Method: Baking
- Cuisine: American
- Diet: Vegetarian
Description
Celebrate in style with these festive Red, White, and Blue Whoopie Pies. Soft, colorful cake rounds sandwich a creamy vanilla cream cheese filling, adorned with patriotic sprinkles—perfect for summer parties, Independence Day, or any occasion that calls for a fun, flavorful treat.
Ingredients
Cake Batter:
- 1 box white cake mix
- 1 small (3.4 oz) box instant vanilla pudding mix
- 8 tablespoons (1/2 cup) unsalted butter, softened
- 2 large eggs, room temperature
- Red food coloring
- Blue food coloring
Filling:
- 8 ounces cream cheese, softened
- 3 cups powdered sugar
- 4 teaspoons vanilla extract
- Red, white, and blue sprinkles
Instructions
- Preheat oven and prepare pans: Position a rack in the center of the oven and preheat to 350°F (175°C). Line two baking sheets with parchment paper to prevent sticking and ensure even baking.
- Make the batter: In the bowl of a stand mixer fitted with the paddle attachment, combine the white cake mix and instant vanilla pudding mix. Add softened butter and eggs, then beat on medium speed until fully combined and thick.
- Divide and color the batter: Split the batter evenly into two bowls. Add red food coloring to one and blue food coloring to the other. Stir each until the color is uniform without streaks.
- Portion the cookies: Using a tablespoon or small cookie scoop, drop rounds of batter onto the prepared baking sheets, spacing them at least 2 inches apart to allow spreading.
- Bake the cookies: Bake one sheet at a time in the preheated oven for about 10 minutes, until the rounds spring back when gently pressed. Cool on the baking sheet for 3 minutes before transferring to a wire rack to cool completely.
- Prepare the filling: In a clean mixer bowl with the paddle attachment, beat the softened cream cheese and powdered sugar on medium-high speed until light and fluffy, about 3-5 minutes. Add vanilla extract and mix until fully incorporated.
- Assemble the whoopie pies: Once cookies are fully cooled, spread a generous layer of cream cheese filling on the flat side of one cookie. Top with another cookie, flat side down, forming a sandwich.
- Add sprinkles: Roll or sprinkle the edges of the filling with red, white, and blue sprinkles for a festive touch. Repeat with remaining cookies and filling.
- Chill and serve: Place assembled whoopie pies in an airtight container and refrigerate until ready to serve. For best flavor and texture, allow them to come to room temperature before serving.
Notes
- Use room temperature eggs and butter for better batter consistency.
- Ensure cookies are completely cooled before filling to prevent melting the cream cheese mixture.
- For a more intense color, add food coloring gradually until desired shade is achieved.
- Store whoopie pies in the refrigerator up to 3 days for freshness.
- These can be made a day ahead, saving time on event day.


